Home

The way to produce Dark Rough-Hewn Wood on Walls Look Lighter

Rough-hewn wood can give any room a cabin-in-the-woods atmosphere, but it looks best when it’s new. Dirt build-up can provide blonde hardwood an unattractive pallor, and it may earn a dark-toned timber even darker. You can lighten any timber by cleaning it, but in some cases, it may take more drastic measures to lighten the shadow in your “cabin.” One of the most extreme measures is to provide the wood a coat of stain to simulate whitewashing. Stain changes the timber shade, though, so before you do this, you may want to try out some choices.

Mix a solution of 2 oz of trisodium phosphate crystals per gallon of warm water. Wear rubber gloves and goggles when using this solution, because it’s caustic. If the walls are greasy, add two ounces of liquid ammonia to this mixture.

Use a sponge along with a long-handled sponge mop to clean the walls. Be sure to lay plastic sheeting on the ground Redding to move the furniture out of the way before you begin cleaning. After washing with the TSP solution, rub on the walls by washing them again with clear water, then allow them to dry.

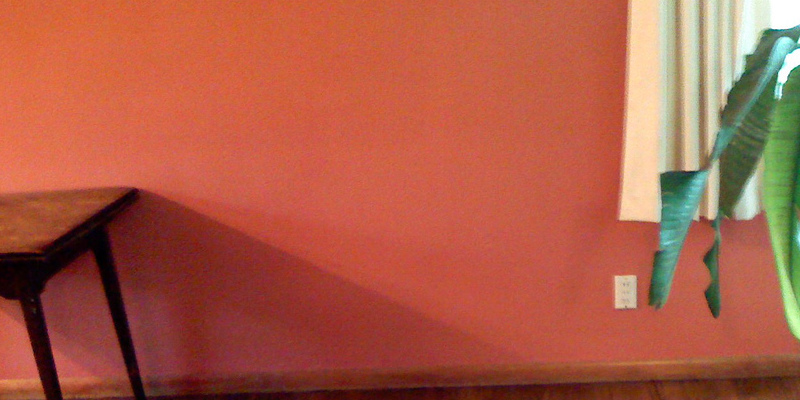
Change the window coverings to blinds or a kind of covering that admits more light. Your insulating material may keep the room warm, but in addition they maintain it dark. Replace them with translucent curtains, or, in least, tie them back so that they don’t create shade.

Put one or two mirrors in the room to reveal the light in the windows and distribute it throughout the room. Angle them to reflect sunlight onto the walls. Set a light carpet in the room and transfer your lighter furniture from different rooms to this one.

Bleach the walls with oxalic acid to soften the timber without altering its natural tones, even if the walls are still too dark. This step only works on unfinished wood. Mix 11 to 16 ounces of oxalic acid crystals — available at hardware stores — per gallon of water and clean the walls in precisely the same manner you washed them with TSP, using gloves and goggles. Allow the bleach dry, then then wash again in the event the shade is not light enough.

Neutralize the oxalic acid by washing the walls with a solution of 3 ounces of borax per gallon of water, then washing again with clear water.

Lighten the walls with stain if no additional procedures serve to make them light enough. Paint a whitened semi-transparent stain onto the timber with a paintbrush and wipe off the surplus with a rag, with the grain of the timber. Let the stain dry, then protect it with a coat of clear polyurethane finish, if desired.

Home

How to Use Cabinets as Seating

Cabinets old and new can be used for much more than just storing dishes, towels or cleaning equipment. Window seats, breakfast nooks and storage benches are only a couple of the kinds of seats which you are able to create from cabinets; the best part is that the basic structure is already constructed, saving you time. Wall-mounted cabinets offer you a larger assortment of height options than foundation cabinets, allowing you to create seating which suits the requirements of those using it.

Window Seat

A wall cupboard with 2 doors serves as a window seat when fitted with a leading board for a cushion and trim to create the seat appear more like seating and much less like a closet. A 24-inch-high cabinet designed for use above a refrigerator sits in a height well-suited for a window seat; utilize two or much more next to one another, depending on the accessible space for your seat. Construct a platform 4 inches high from plywood and board exactly the same width as the cabinets, then sit down the cabinets atop it, then securing them to the platform. Screw the cabinets into wall studs to keep them from sliding. Pick 3/4-inch-thick wood to produce the seat atop the cabinets and carry it in place with wall cleats. Toe-kick molding hides the platform and supplies the seat a finished look. Cushions atop the seats round out the look.

Breakfast Nook

Create a breakfast nook or a dining area at a corner having a pair of two-door wall-mounted cabinets as the foundation for each seat. Construct a 4-inch platform for each cabinet to sit upon, then nail or screw the cabinets to the platform. A single-door cabinet, doors removed, can be used for the corner of the L-shaped seating region to maintain both benches the identical span, instead of one cabinet set overlapping the other. Build bench tops for the seats from 3/4-inch wood or fiberboard, attaching them to the base with nails or screws. Secure the cabinets to wall studs at the nook and also attach patio or porch-swing-style cushions to the wall with strips of sticky-backed hook-and-loop tape to create a cozy back for those seats. The same sort of cushions can be used for the seats as well.

Storage Bench

A freestanding storage bench for use indoors or out starts with a set of wall cabinets. A two-door cabinet offers cozy seating for 2, even though a single-door unit provides a storage bench for an area tight on space. Build a sturdy base platform a few inches high in boards and plywood, then nail or screw the closet into the platform. Add bead board to the back-side of the cabinet if that side will be exposed; the sides can be covered in bead board as well. A 3/4-inch-thick board serves as the topper for the cabinet, together with a cushion to fit. If using it outside, paint the structure with exterior paint and polyurethane, and add a seat cushion designed for outdoor usage.

Banquette Basics

Construct a massive banquette or even an whole wall of seating in much the same manner as building a nook or window seats. Line up a series of wall-mounted cabinets, all the same height and thickness, to make a banquette as long as you’d like. Construct a 4-inch base platform for the structure and secure each cabinet section to the foundation, adding toe-kick trim to conceal the foundation. The seat or top is made from 3/4-inch wood. Remove all cabinet doors and paint the interiors of the cabinets for bookshelf-style storage or maintain the doors intact for hidden storage. In a child’s room, the seating serves as spot to stash toys or as a substitute for a dresser.

Home

The Best strategies to Remove Fabric From the Sofa When Reupholstering

You are able to reupholster furniture in one of two ways: Eliminate the old fabric and start fresh or cover the old stuff with fresh. While maintaining the material in place may seem simpler, removing the old fabric first allows you to utilize it as a template to make a pattern for the new material. Removing the fabric with thoughtless haste may result in it ripping away into small pieces, making it useless as a template. Taking time with fabric removal utilizing age-old practices ensures the old stuff, no matter how beat up, remains intact when pulled from the furniture.

Staple- and Tack-Pulling Tools

The fabric on many upholstered furniture pieces is held in place with staples, if the furniture is nearly new or handed down through many generations. A regular office staple remover is the only device you will need for many upholstery occupations. When a staple remover isn’t powerful enough to eliminate the staples, pry them up with a narrow slotted screwdriver or a tack puller. A ripping chisel and wooden mallet team up to get rid of stubborn staples as well as upholstery tacks. Needle-nose pliers help pry away partially loose or broken staples.

The Staple-Pulling Procedure

Pick 1 area of their furniture to work on at a time, for instance, the seat fabric in an upholstered chair. Flip the seat over to locate the staples holding the fabric in place and work your way across the piece of fabric, removing the staples one at a time, in order. Though you might be tempted to pull the material to free many staples simultaneously, doing so may cause the material to tear. Keep a trash can handy to guarantee the pulled staples do not end up on the ground Fresno, where they might cause harm or damage your vacuum cleaner. Wear eye protection when pulling staples. If decorative tacks embellish the upholstery, pull those out prior to removing the staples, using a tack puller.

Mark the Materials

When working with numerous pieces of fabric, like the arms, back, sides and front of a sofa, you might be perplexed trying to remember which piece goes where unless you mark the pieces. Put a strip of masking tape on each piece of fabric as you eliminate it, noting the place where it goes, like “left arm” or “left arm exterior panel” Mark the new pieces in exactly the same fashion as you trace the old on the new, so you’re able to reupholster the slice in a reasonable manner without attempting to guess the alignment or alignment of each piece.

Dealing With Difficult Staples

If one staple or several in a row are so stubborn that you can not pull them from the top side of this fabric, work a tool like a slotted screwdriver between the fabric and furniture frame. Wiggle the instrument around, ideally working it between both prongs of the staple until the staple lifts. Pull the staple out the remaining portion of the way from over the fabric, or by continuing to wiggle the instrument till the staple pops out.