Home

Houzz Tour: A Loving Remodel for High-School Sweethearts

It is like something out of a book: Michael and Ellie Mroz locked eyes their freshman year of high school in Westfield, N.J., and have been together ever since. After graduating from high school and college, the couple moved back to their hometown where both of their families still reside. They found their dream home — a 72-year-old home on a tree-lined road. The home hadn’t been changed in more than 60 decades, so the couple needed to redo almost everything. “We wanted to expand and upgrade the home, and infuse our clean, classic and coastal style in the existing structure,” Ellie says.

Michael Robert Construction

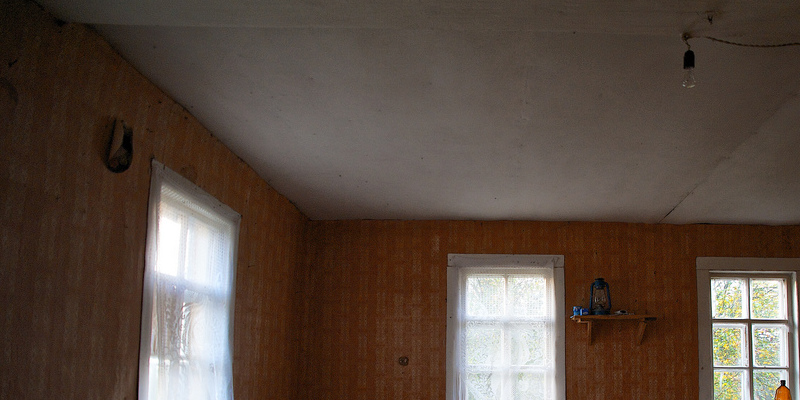
Michael was the general contractor to the home, therefore he and Ellie decided to make minimal adjustments to the outside of the home. The couple wished to keep the home’s authentic look and match the rest of the area. A new garage was added to the home, however the only other changes outdoors are aluminum flashing and new trimming.

Michael Robert Construction

Light oak floors, exposed beams, white trimming and also blue-toned paints contribute the coastal style they wanted. In the foyer hardwood floors with a walnut border were set up. Ellie picked a navy grasscloth wallpaper for the walls. “I’m a huge fan of decorating with texture instead of loud colours or prints,” she states. “I think walls are a excellent spot to do this.”

A sharp navy and white geometric carpet was selected for the stairs, and the stair rods are capped with pineapple finials, finishing off the foyer’s coastal look.

Background: Thibaut
Light fixture: Hampton Semi-Flushmount, Hudson Valley

Michael Robert Construction

Ellie and Michael decided to use a lower-grade bamboo floor for more version, thickness and warmth. In the formal dining room (initially the home’s living room), they also installed a light fixture and trestle table and added wainscotting and coffering on the ceiling and walls.

Table: Trestle Salvaged Wood Extension Dining Table, Restoration Hardware
Chandelier: Pillar Candle Large Chandelier, Restoration Hardware
Chairs: HENRIKSDAL Chair, IKEA

Michael Robert Construction

The blue-gray island is almost 10 feet long, providing Ellie lots of space to entertain and cook. She and Michael decided to provide the Carrara marble counter the look of a double edged slab by mitering the edge of this only 2.5-inch piece. “It’s a great industrial sense, and the production is superb,” Ellie says. “The veins of the masonry follow down over the edge to give it a smooth look.”

Pendant: Benson Pendant
Cowhide: KOLDBY, IKEA

Michael Robert Construction

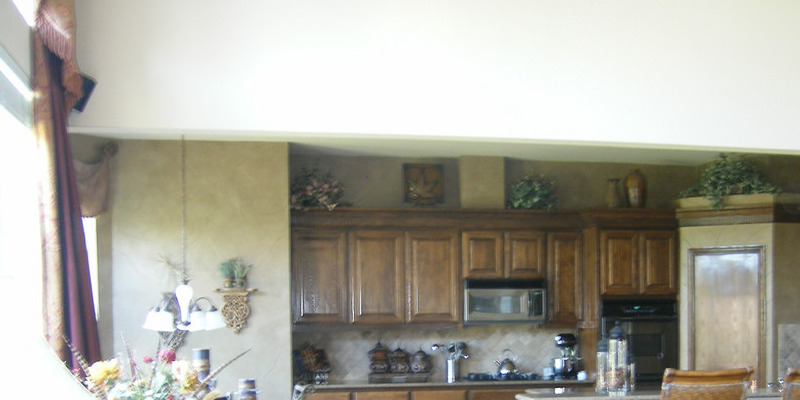
Even though the kitchen already receives a ton of light from the large window in the adjacent breakfast nook, Ellie and Michael add narrow windows on both sides of the stove to let in even more natural lighting.

Barstools: Pier 1
Cabinetry: Brookhaven by Woodmode combined with some habit pieces/panels

Michael Robert Construction

The backsplash behind the desk area from the kitchen was painted with magnetic primer and chalkboard paint, which makes it the ideal spot to leave notes. The built-in cabinetry is in precisely the exact same style as the rest of the kitchen to create a unified look.

Michael Robert Construction

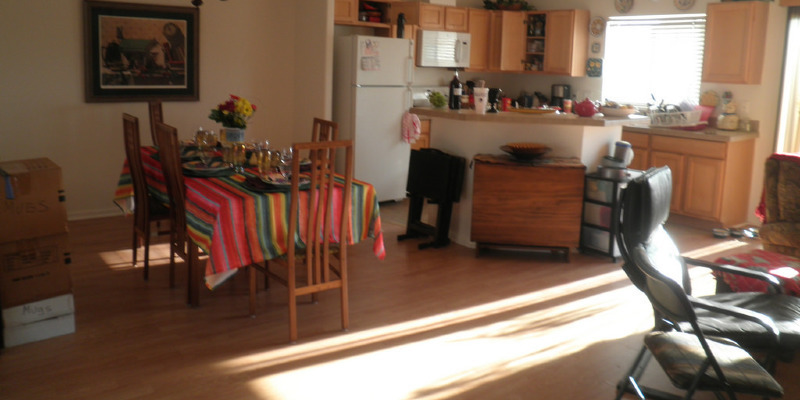
A custom half-circle window was set up in the breakfast nook. The window makes the space feel bigger by supplying a view straight into the backyard and enabling lots of morning light to filter through. A built-in bench offers extra seating and makes the space feel cozy.

Table: Montego Dining table in black, Pottery Barn
Chairs: Aaron Wood Seat Chair in black, Pottery Barn
Pendant: Victorian Resort Pendant in glossy nickel, Restoration Hardware

Michael Robert Construction

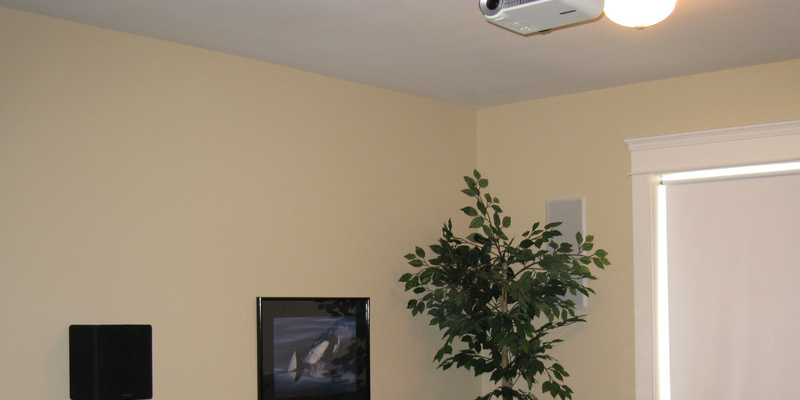
Among Ellie’s favourite features is that the ceiling she made in the great room. The ceiling is a glossy white beadboard with flat beams (the room did not have the elevation for dropped beams). The area right next to the living room is the kids’ play area. Here, the couple decided to make the ceiling a bit bigger and abandon the beadboard in a natural colour. The difference gives a subtle awareness of differentiation between the two spaces, and aids the play place feel warmer.

Couches: Baldwin slipcovered sofa and seat, Macy’s
Play place carpet: Skip Hop Playspot

Michael Robert Construction

The rustic-looking wood press unit comes from Restoration Hardware, and Ellie and Michael additional shoe molding to give it a much more custom, built-in look. The majority of the goods in the home are a mix of Restoration Hardware, Pottery Barn, Crate & Barrel and IKEA, blended with a couple finds from local shops and their travels.

Michael Robert Construction

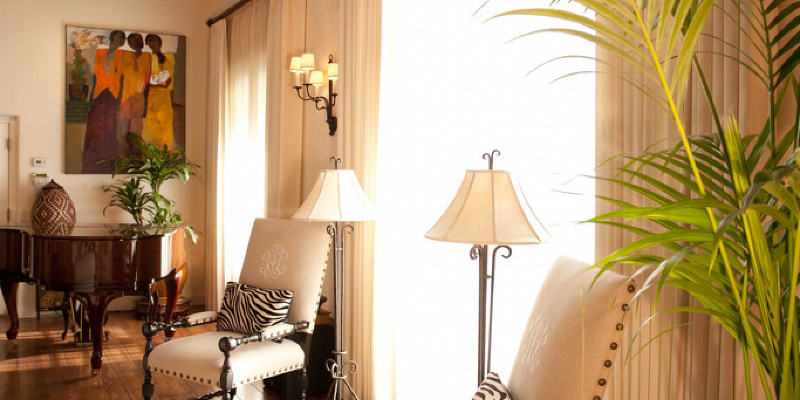
This formal living room was initially the home’s dining room. Since they love to entertain and also have family dinners, the couple decided a bigger dining room would better suit their lifestyle. For the walls, Ellie picked a plastic grey wallpaper with a silk-like look. But since it is made of such durable material, it can be scrubbed, washed and even bleached — ideal for a home with two small children.

Arm chairs: Pottery Barn
Couch: Bayside Total Sleeper, Crate & Barrel
Ceiling pendant: Finley Small White Pendant, Crate & Barrel
Background: Thibaut

Michael Robert Construction

The mudroom was a great practical improvement for this growing family. The couple brightened up the area with apple green baskets and a cheerful turquoise door. “This doorway is very special to people,” Ellie says. “My husband calls it the ‘grin door’ since it makes him smile every morning when he leaves for work.”

Tile: Tumbled Travertine
Paint color: Castaway by Dunn Edwards

Michael Robert Construction

Ellie and Michael made the upstairs master suite for a respite from their busy lifestyles. Dark wood furniture contrasts with a subtle and pearlescent wallpaper. Classically designed light fixtures stay in accord with the kind of the rest of the home.

More Houzz Tours:
A Home Full of History and Surprise
Fantasy Surf Shack in Pleasure Point
Modern Shingle Style in Utah

See related

Home

Warm Up Your House for Winter

Chilly temperatures may save you from being outdoors for more of the day, but it’s not all bad, especially when your insides are über comfy. As you’re busy preparing for the upcoming period — winterizing your backyard, swapping wardrobes, turning on the heat — maybe you need to give your space a once-over to check on its cozy appeal. Can it be turned up a notch? Whether it’s by adding a throw, showcasing a pile of books or even trying out a new seating arrangement from the fireplace, then there are lots of alternatives you can try, even if you’re on a budget. Check out these photos to learn what to elements will allow you to produce a comfy space. And cheers to cool weather, comfy interiors and enough hot chocolate to take you through’til spring.

Rugs. Few things are more beautiful than hardwood floors, but they do not qualify as comfy. Rugs not only aid a space feel more cohesive, but they also add warmth.

Summerour Architects

Do not think that a kitchen, with its steel appliances and cold countertops, can not feel comfy. With an oversize rug added to the mix, it surely can.

Bosworth Hoedemaker

Layers. This step is critical, and fortunately it is both affordable and simple. Start by just draping throws over your furniture not only will they come in handy once you want to curl up on the sofa, but they’ll continue to heat the distance as you’re away.

Bosworth Hoedemaker

Continue by adding lots of throw pillows to your sofa and filling your walls with framed art. Do not go overboard: You want your space to feel accumulated, not littered.

Reaume Construction & Design

Drapery and other window treatments add extra warm layers to the space and help trap warmth inside.

JMA (Jim Murphy and Associates)

Novels . There is something about piles of books that instantly warms up any space. Fill your shelves together, place a comfy chair nearby and spend the time catching up on all of your favorite notes.

The best thing about books: they may be set anywhere. Pile them in your coffee table to make a second layer for the décor. You will have successfully mastered two comfy looks in one decorating move. Of coure, a fuzzy pooch is a big help, too.

Paint the walls. One of the simplest and most inexpensive design tricks : our beloved, badger buddy, paint. I like this picture because it demonstrates that even a basement area with little natural light can become a cozy escape with the inclusion of a coating of warm, neutral paint.

Elizabeth Gordon

Do not be afraid to go dark with paint it actually produces a snug feeling. A white crib and traces of colour help this nursery feel bright yet cozy at exactly the same moment.

Studio C Architecture & Interiors

Your toilet can be made instantly comfy with a coating of heavy brown paint and the inclusion of a comfy seat.

Dufner Heighes Inc

Texture. Here’s to demonstrating that a mostly white or neutral space can be comfy: it all depends upon feel. If you are going with this look, ensure your rug, upholstery and accessories have various levels of feel; think of adding a faux sheepskin throw over a duvet sofa. In this photo, the marble mantel brings additional texture to the space.

Crisp Architects

Chairs arrangements from the fireplace. There is nothing cozier than a fireplace, so get right up there and appreciate it. You can roast each of the marshmallows you want without uncrossing your legs.

Susan Jay Design

Nooks. If your home gets the architectural advantage of a nook, transform it into a comfy little reading escape.

Webber + Studio, Architects

Little spaces. This is only one of the pricier methods to create a comfy space, but as soon as you do it, you will wonder why you waited. If you’ve got an awkward, rather small space which you can not envision being useful. Small rooms are instantly comfy due to their romantic nature, so look at altering it into a reading area or little study.

MN Builders

The attic. The loft isn’t only for storage. It can be transformed into a snug living room (more cozy if you are fortunate enough to have sloped ceilings). It might be a small project, but it’s worth it. Outfit it with a fireplace (consider a fake one if a real one is not possible), a shag rug and cozy furniture, and voila — it’s chic, cozy and more space for living!

See related

Home

Indoor Gardening: Succulents and Herbs

The orange and orange palette of autumn flowers does not match every interior’s style. Pots of herbs or succulents are great options to classic autumn floral arrangements. They’re low maintenance, smart looking, and also a wonderful way to bring the outdoors inside. There is even a practical aspect in the case of the herbs, which are helpful for cooking. And succulents barely ever require water.

These plants work well in kitchens, family rooms, vestibules, and outside eating areas, and add a subtle elegance to any room.

Shape a thyme plant to some contemporary topiary form. Paired with all the pine box holder, the look feels rustic. And this type of tall plant makes a fun design element.

Mark English Architects, AIA

Green herbs on the counter soften the bold look of the bright orange island and cabinets in this slick modern kitchen, which makes the room feel more homey.

SFGIRLBYBAY

Herbs growing in the windows incorporate life in an otherwise quite white space.

Rosemary is so easy to grow and can be so aromatic. Just be sure that it gets some sun while you’ve got it indoors. Wrapped in burlap tied with twine, it appears like it’s in the kitchen of a Paris apartment.

Andrew Flesher Interiors

Discuss elegant: the sole greenery to be observed in this chic living room is a closely trimmed thyme topiary tree before the window. The potted herb brings something fresh and living to the room without taking away from the inherent masculinity of the furnishings. And the green of this plant matches the green of this blanket, a pleasant, harmonious choice.

Bonfigli Design

Function trumps form , with pots of herbs stashed alongside bottles of wine while an Italian feast is merely waiting to be cooked up. An individual can attain a similar look by simply taking cut bunches of the herbs, putting them in plain water, and using them for a couple of days.

Greener Grass Design

HERB POT DUO – $35

Modern take on the herb garden: This watering basin for developing herbs permits you to begin with seeds and experience the satisfaction of appearing green.

Williams-Sonoma

Herb Window Box – $59.95

GIve a window like this as much sun as possible through autumn and winter. I adore the idea of putting it an unexpected, slightly more formal environ from time to time. For instance, try this in your dining room in exchange for a normal arrangement.

Amoroso Design

The three potted plants match the putty-and-white colour scheme of this slick open-shelved kitchen corner.

Lisa Borgnes Giramonti

Orchids bloom during quite a while, and this one gets additional interest from succulents planted at its foundation. This entire tablescape feels arty, and the floral/succulent addition includes a sculptural aesthetic.

Susan Diana Harris Interior Design

This is actually revolutionary: succulent plants growing in dish-like baskets positioned softly on the floor. The minimalistic bed and overall vibe of this room is enhanced by these plants. The key to get the look right is locating plants and containers large enough to appear dull.

Dufner Heighes Inc

The tree branch foundation on the coffee table has so much going on that it appears the sole floral choice that would be easy on the eye would be a succulent plant, like a blue-gray agave at a neutral, stone-color container.

Kristen Rivoli Interior Design

There is so much color here that seasonal blossoms would most likely compete or struggle with the scheme. A grouping of succulents, however, is a living, natural accessory which matches the vivid choices.

Succulent Baking Tray – $158

Instead of the usual set of sunflowers and mums, consider decorating with little pots of succulents which will last through the winter. These cry to get a kitchen window, but also would be a accent to your own coffee table from time to time.

VivaTerra

Basket of Succulents – $35

These succulents are referred to as cows and fish, and therefore will send offshoots over the side of the basket. These plants are great deals that add a bit of Southwestern charm to any space.

See related

Home

<p>Guest Groups: Creative Craft Space</p>

If you craft, then you want a dedicated space that’s both functional and beautiful, whether you have an entire room bathed in natural light (lucky!) Or only a nook or cupboard to phone your own. This month, I’ve gathered 20 locates that will help pull together your creative craft space. From appealing storage to furnishings, supplies and inspirational artwork and books, you will find just a little bit of everything . Happy crafting! — Laura out of Lolalina

Hudson Paint

Hudson Chalkboard Paint – $24.99

I am sure we all understand the marvels of chalkboard paint by now, but what about chalkboard paint in any colour you want? Hudson Paint company makes wonderful chalkboard paint at a full range of colors, so you can paint that accent wall or classic cupboard and draw on it, also!

Cox & Cox

Wooden Wall Unit – GBP 115

This good fir wall unit out of Cox & Cox will be just the thing for organizing craft supplies or stationery. The bins even have space for your labels.

Wisteria

Sawhorse Workstation – $399

I adore the simplicity of this sawhorse desk out of Wisteria. The adjustable table elevation means you can work sitting or standing depending on your needs at the moment.

Twine

Jeu de Paumes – $39

Édition Paumes books from Japan are a bit of an obsession among those in the know — every slim book is packed with interior design and craft inspiration from real homes around the world. And the covers seem so cute stacked up on your desk, how do you resist?

Etsy

Wood and Wool Stool – $108

Dutch designer Ingrid Jansen makes these beautiful stools from reclaimed wood and hand-crocheted covers. Each is unique, so check the store for certain pieces available today. This little piece is so flexible: use it as extra seats, a footrest, or a desk for stacking books and magazines.

Orla Kiely

Orla Kiely Notebook Set – $12.50

I am a huge lover of Orla Kiely’s modern prints, and these little notebooks are an inexpensive way to bring her routines into your home. Plus, they are great for journaling or sketching out new craft ideas.

A+R

Wood Architect Lamp – $295

Lighting is so essential in a work space, even if your craft”room” is similar to a cupboard. Whenever you are doing close work such as beading, sewing or sketching, task lighting is key. This all-wood version of the timeless architect’s lamp recently caught my eye — I love the chunky shape and raw appearance, along with the quality construction means it is going to last for many years to come.

Design Within Reach

Tolix Marais Barstool | Design Within Reach – $180

These classic stools out of Tolix in France look refreshing in mint green. Obviously, when you work at a desk for long intervals, you are going to want a chair, but stools are perfect for the kind of crafting at which you are up and down a lot. And they happen to be on sale right now at Design Within Reach — bonus!

Etsy

“We stayed just along the shore…” by Sarah Ahearn Bellemare – $22

An essential ingredient in any craft space is inspiration, and what better way to inspire than with work out of a popular artist? I adore the colors and the use of a vintage photo in this print out of Sarah Ahearn Bellemare.

Etsy

Cuplight Candle Holder by snugstudio – $47.90

I adore having candles lit while I work — it adds much to the ambiance, and I swear it also enhances creativity. Do not save candles for special occasions! These cuplights from German brand Snug Studio are so magical, I would line up a few in a windowsill.

Enjoy Loans + Linen

Ceramic Latte Cups – AUD 30

These handmade cups by Samantha Robinson are similar to functional works of art. I would use one to display charcoal pencils, paint brushes, or layout pens. However, by all means, use them for your own coffee if you prefer!

Etsy

Quilted Sewing Machine Cover by CityChicCountryMouse – $58

While I get the sewing machine I’ve been pining after for ages, I would love one of these handmade quilted covers to slip over it. This one is made of tasty Amy Butler fabric, certain to cheer up any sewing room.

Hable Construction

Charcoal Checker Storage Box – $98

These little bins from Hable Construction happen to be on my wish list indefinitely. They’re sized perfectly for corralling just about anything you can think about, and the material is wonderfully thick. Use one for every knitting project, to organize your fabric stash, and keep your paper ephemera collection clean, or perhaps put letter-sized files inside.

Happy Tape

Japanese Masking Tape – $36

Japanese masking tape, also known as Washi tape, is a wonderfully versatile craft merchandise. I cannot imagine life without it. Use it to embellish packages and envelopes, make collages, make tags, decorate vases, boxes, or graphic frames — the possibilities are infinite.

Dimensions: 15 mm (approximately 1/2″) or 9 mm (approximately 1/4″) wide x 15 m (about 50′) long. 10 rolls.

Anthropologie

Where Can I Put It? Knob – $10

Swapping out plain hardware for something interesting is the simplest way to revamp an old chest or storage cupboard. Anthropologie always has the cutest choice, and these are my current favorites.

Etsy

Crochet Granny Square Rug by lacasadecoto – EUR 63

I love the texture and colour of this handmade granny-chic rug. Just the thing for heating cold toes in the studio on a chilly fall morning!

Anthropologie

Musings Tray – $48

This artsy little ceramic tray is hand-stamped with poetry from Australian potter/poet Kylie Johnson. Put it on your desk or atop a little pile of books with a few feathers or pretty stones for inspiration.

Etsy

Handmade Love Bird Soft Sculpture by ashleyannabrown – $65

This sweet soft sculpture from Ashley Anna Brown will make a friendly artwork studio company. I have one of Ashley’s bits, and I can tell you from personal experience they are amazingly detailed and well crafted. Each is unique and beautiful in its own way.

Terrain

Flora & Wood Trim Settee – $2,498

And also the great final touch? A luxurious settee to lounge on while dreaming up your next job.

Next: More guest blogger merchandise selections

See related

Home

Houzz Tour: A Brooklyn Landmark Returns to Glory

Locating design inspiration on the internet is commonplace by the current standards, but finding your future house through a picture search is a whole other animal, especially when the residence is a 5-story brownstone in severe need of a renovation.

After finishing a prior project for those homeowners, architect Kimberly Neuhaus was brought on to head this ambitious project in Brooklyn’s Clinton Hill area. At the time the house was used as a rooming house for students, a musician’s recording studio, and the occasional basement nightclub. It was only after Neuhaus visited the site did she realize that something special had been unearthed.

Built in 1887 with a co-founder of Pfizer for his daughter and her loved ones, the residence had seen a varied assortment of owners throughout the years and had endured the neglect that often comes with the cost of keeping up a 10,000-square-foot home over a hundred years old.

Throughout a clear and consistent design vision and a team of remodeling specialists, the house was restored beyond its first glory to become the ideal house for a family of four — as well as the community at large.

Neuhaus Design Architecture, P.C.

Neuhaus and her team were presented with the responsibility and challenge of the renovation and preservation of a significant neighborhood landmark.

With historical architecture renovations, maintaining total period authenticity presents itself as an obvious solution. But that frequently feels quite dated, and possibly overly spammy. Rather, Neuhaus produced a hybrid option fusing contemporary and period design that combines the architectural tradition of the brownstone with its people’ modern perspective and lifestyle.

The home exterior and architecture was treated as a metaphorical envelope and could retain its period integrity. Interior features like the cabinetry, bathrooms, furnishings, light fixtures, stairs, etc.. were seen as the contents of this envelope and so could serve as contemporary insertions to the space.

Neuhaus Design Architecture, P.C.

Wood floors in the home represent a convergence of the two. While the wood itself isn’t original to the house, parquet borders found under layers of asbestos tile and carpeting motivated the new flooring design. “CAD drawings and a CNC machine were used to reestablish sections of exactly what some craftsman had initially done by hand,” says Neuhaus.

Neuhaus Design Architecture, P.C.

Jessica Warren worked closely together with Neuhaus and the remainder of the team and acted as the interior designer for her home — and has subsequently founded an interior design company. Since nearly all the furnishings were owned by the client, a great deal of inspiration and collaboration originated from her collection.

Neuhaus Design Architecture, P.C.

The home reads as an unofficial gallery of priceless and one-of-a-kind collectibles, but it is the unpretentious and casual show of these art pieces which makes them so much more accessible.

Brutalist panels purchased on eBay, which formerly were displayed on the clients’ dining room walls, today serve as doors on this media console.

Neuhaus Design Architecture, P.C.

The furniture reveals a life of selection and curating — a lot of that had been in storage until the clients moved into a house large enough to utilize them.

The collection is a visual representation of the clients themselves and the lives they have lived thus far. An assortment of antiques, thrift-store finds and classic treasures are paired side-by-side using custom and reissue pieces.

Neuhaus Design Architecture, P.C.

With the exception of the kitchen addition, nearly all the job on the parlor level was decorative work — by the first trim and molding to the ornate leaded windows found here.

Neuhaus Design Architecture, P.C.

With the original kitchen gutted, a contemporary redesign was able to come into fruition while still paying homage to the architecture of this conservatory that stood at that space.

The achievement of this complicated design of contradictions stems substantially from Neuhaus’s vision, and she is quick to credit her team for its best execution. “The ability with which that was done really speaks to the beauty of working with a building manager and subcontractors that have great respect for, and experience , old houses.”

Neuhaus Design Architecture, P.C.

Neuhaus created and designed this kitchen storage device to show the family’s ceramic collection. Like most things now prominently displayed through the home, these too had been in storage. The client wanted very observable and accessible storage to these bits.

Neuhaus Design Architecture, P.C.

The kitchen itself is a bunch of all things modern, although the curved weight-and-chain dividers keep a link to the past. “Towards the close of the project we had winter meetings sitting at the table at the apse of this space, and when it snows it seems a bit like you’re sitting inside a clearing roads of snow New Haven globe,” Neuhaus says.

Neuhaus Design Architecture, P.C.

From the outside, the first curved brick foundation of this conservatory becomes far more apparent. The newly added aluminum roofing takes its inspiration from the initial form of this construction.

Neuhaus Design Architecture, P.C.

While historical integrity was key when it came to many of the structural choices, color played a major role in determining the decoration and materials that would be used through the home’s interior. Warren originally envisioned the whole house would be done in a version of”camouflage” colours. Neuhaus and Warren took this inspiration and interpreted it into a palette characterized as”neutrals with colour ” Dominated by muted blues, grays, and tans, and accented with dark and heavy woodwork or metallic accents, an cohesive and overriding theme is created through the whole home.

“We sealed those first colours in a bag together, and it was astonishing how consistently we were able to utilize them, with minor variations depending on the light in the space, throughout the whole project. That bag of colours functioned as a sort of touchstone as we moved forward through the home.”

Neuhaus Design Architecture, P.C.

Even the individual colours in the banding of this rock gray onyx from the wet bar is in accordance with the color scheme. The boldness of this spectacular slab is almost downplayed by the fact it is so in line with the colours used throughout the home.

Neuhaus Design Architecture, P.C.

While the carefully curated color palette and material choice is an obvious contributor to an overall sense of lightness that abounds the home, the home itself plays a main role for this result. The brownstone extends nearly the whole length of this block, and because of this three walls get natural light — very unusual for New York City. Intricate woodwork and darker accents still maintain an airy quality due to the lack of artificial light.

Neuhaus Design Architecture, P.C.

Bringing natural light to the basement level proved to be a challenge. The staircase from the parlor level to the basement is built at a masonry shaft beneath a copper skylight which had been formerly roofed over.

Neuhaus Design Architecture, P.C.

Following a set of vigorous back and forth negotiations between Neuhaus, her dad’s firm StudioRed Architects, the building manager, and the fabricator, a perfected steel and wood open riser design was settled upon.

Neuhaus Design Architecture, P.C.

By daylighting the skylight and enabling as much natural light to permeate through the staircase as you can, the formerly dark and barren basement today invites sun to the home’s deepest depths.

Neuhaus Design Architecture, P.C.

Reminders of previous dwellers were continuous throughout the renovation — a few more apparent than others. Before being substituted, the windows of this bathing area were dominated with religious iconography — remnants of the Roman Catholic Diocese that possessed and occupied this home and its twin next door from the 1930s until 1989. The glass needed to to go.

“However we must laugh as a cross reappears in that area at a certain time each day,” Neuhaus says,”if the light from external hits the tub faucet at a certain angle and jobs a ideal crucifix throughout the room”

Neuhaus Design Architecture, P.C.

Original details were revived and preserved when possible. “We set two major goals for the project: The first would be to create a dialogue between the home and the items and interventions inside it,” Neuhaus says. “The second wasn’t to eliminate the sense of this being an old residence. We did not want to renovate the life out of it”

Neuhaus Design Architecture, P.C.

Continuing with the envelope metaphor, outside window materials and styles remained loyal to the era of the home. While the hardware and shelving of this closet are contemporary, its tie to the exterior remains architecturally historical.

“We really enjoy seeing the dialogue between the old and the newest. The things we chose to eliminate were largely items that obscured the true elegance of the home.”

Neuhaus Design Architecture, P.C.

While the home itself boasts a shocking four stories and a basement flat, rooms, similar to this toilet, were created to be inviting and comfortable. First and foremost, this space was pictured as a family dwelling.

Neuhaus Design Architecture, P.C.

For that reason, there is a clear demarcation between private and public spaces in the house — with all the bedrooms residing in the top stories of the home whereas the open living spaces remain on the entry level for hosting romantic cultural events and fundraisers.

Neuhaus Design Architecture, P.C.

The clients’ cherished art collection fills the walls across the general public and private regions of the house. Originally a personalized wall installation from the clients’ past entryway, this piece by artist SWOON was hidden between 2 pieces of glass to be displayed from the Clinton Hill house.

Neuhaus Design Architecture, P.C.

In the guest bedroom, a unique woodblock used for the posters of a traveling carnival is just another reminder of the clients’ cultured travels and the significance attached to each product furnishing their property.

The spacious and accessible approach to art and home has led this home in Clinton Hill to become an unofficial salon and gathering space. Whether it be a neighborhood joyful hour; a location for local art students to showcase their job; and talks of hosting an opera composed for a residential setting, the Clinton Hill brownstone has kept its heritage as a historical residence and a space for a neighborhood to develop.

More:
Houzz Tour: New Orleans Glamour
Houzz Tour: Edith Wharton’s The Mount
Houzz Tour: Historic Home in Austin, Texas

See related

Home

Let’s Hear It for Townhomes and Duplexes

While the majority of the thousands of photographs on Houzz pertain to single-family homes, a number of multi-family jobs can also be found. They offer alternatives in contexts but also in towns not only to homes.

These new methods of both retrofitting and infilling the suburbs are coming to the fore in the face of energy and climate crises. Multi-family home of even two units offers the benefits of more efficient heating and heating arising from shared walls and generally smaller house sizes, a decrease in water use for yards, and also the potential to generate enough density in an area to make walking a feasible alternative to driving.

Eggleston Farkas Architects

This development in Seattle, Wash. made by Eggleston Farkas offers an alternative to typical townhomes in the area, putting duplex units on the road with three broader units in the back of each building. The modern design in wood and concrete features generous glazing to provide the units plenty of natural light.

Seattle is also home to Pb Elemental, who have designed lots of multi-family jobs — a few “twins” with exactly the same or comparable plans mirrored on each side of a walkway or shared wall.

The second-floor volumes here articulate the openings differently to provide each residence its own individuality, while still making it clear that they are part of a single project.

These townhomes, also made by Pb Elemental, appears to be situated next to smaller homes. Turned 90 degrees to the road, using a driveway on the other side, the job fits a somewhat narrow bit and comes closer in scale to its neighbors. The modern design in timber is surely pleasing.

A previous Pb Elemental project comprises three live/work units with ground floor retail area. Pictured are two units in the trunk, removed in the road from the front building and also an area for parking. Notice the paving.

David Vandervort Architects

Here is a development using four townhomes, also in Seattle, which is more conventional in appearance, pitched roofs and all. Collective living need not mean stylistic antagonism; it can take cues in the local fashion whilst offering a lower ecological footprint and other 21st-century benefits.

Another Seattle development incorporates balconies and courtyards oriented to gardens and a water feature. The latter is a key draw to the job whilst creating a strong awareness of entrance via bridges on the road home.

Maltby Design

This duplex job in Vancouver, British Columbia comprises generous balconies facing the road and a rooftop deck. There is something striking and appealing about the yellow wood which makes up this particular elevation.

Contemporary house architects

As mentioned earlier, a common way of designing multiple units would be to mirror duplicate or similar plans. Here that is evident in the entrance to a couple units of a three-unit job. But seen overall …

Contemporary house architects

The entire job isn’t as symmetrical as the entrance in the previous photo would have us believe. The next unit gives it an asymmetrical form that almost makes it look like a massive house — if it weren’t for the three garages under the balconies.

Studio Momentum Architects, PC

Here is a duplex in Austin, Texas that also appears to be a large residence in the road. 1 unit faces the front, and the second one is tucked in the back, reached via the side driveway.

Zack|de Vito Architecture + Construction

This duplex in San Francisco, Calif. jobs one in front of another to provide each its own character supporting precisely the same garages. The backyard condition …

Zack|de Vito Architecture + Construction

… shows how the terraced backyard, shared by both units, gives privacy to each if desired. Multi-family home does require a particular social negotiation in regards to green space, but it is generally well worth it.

GLS Architecture/Landscape Architecture

The grade of the spaces generated through multi-family housing is surely important. This large job in San Francisco about a block in the love-it-or-hate-it Federal Building from Morphosis) features units facing the streets into the west and east whilst half of the units face the bamboo courtyard pictured here. A view from down on the walkway …

GLS Architecture/Landscape Architecture

Shows this space to be softer than the road fronts. I really could see the courtyard units becoming more desirable — and costly — than the units on the streets.

ON Design Architects

This development of townhomes is situated on a triangular site in Santa Barbara. The residences are oriented with this thoughtfully designed alleyway that looks like it could be a location for block parties and other social gatherings with all the neighbors. Whatever the circumstance, it is an amenity that arises from the density that is a portion of the evolution.

This previous instance, by Rhodes Architecture + Light, illustrates that even single-family homes can be created in improvements to bring their benefits closer to those of multi-family buildings.

Anderson Gardens includes four homes (three new, one renovated) that surround a massive garden. Previously a farmhouse, the property is currently home to a few more homes than another suburban context might support.

Next:
More inspirational architecture

See related

Home

Replacing Destroy Tiles

Wear and tear round the drain in your kitchen is unavoidable, particularly on every one of the completed surfaces. This region is is among the the busiest places in your house. If any tiles are broken, changing them is an easy matter in the event that you use the proper resources and understand the procedure. Replace tiles which can be cracked, chipped or damaged before water damages the tile bed. Infiltrating water will weaken and loosen most of the tiles producing a fix that is much more difficult.

Remove Broken Tiles

Drill three to five holes -inch apart in a straight-line across each tile you intend to eliminate. A power drill using a ¼- inch drill-bit is the most useful instrument for the work. Use both a cold chisel or a carpenter’s nail puller, which has a 90-degree claw on one end, and gently tap using a hammer over the drillholes to crack the tile through. Pry tile items using a flat screw-driver out. Remove most of the tile parts in this way, then remove all the grout from tiles that are adjacent without chipping or cracking them.

Prepare the Tile Mattress

It is important to to eliminate as a lot of the mastic as feasible when the tiles are removed. The alternative tile will sit higher in relation to the tiles when you’re finished should you not eliminate the mastic. For eliminating the mastic a great technique is to frequently scrape the region using a 2 inch-extensive putty knife, before the tile mattress is seen. Use a vacuumcleaner to eliminate dirt or any unfastened particles from your tile mattress before you start to install tiles.

Install New Tiles

Using a notched trowel is essential to attaining the the greatest le Vel of tile adhesion. Your entry to the tile mattress is going to be so limited you will not be capable to use the mastic to the tile mattress having a trowel unless you’re removing several tiles. Instead, contain the the replacement tile upsidedown in one-hand and use the mastic with all the trowel to the back-side of the tile. Ensure that you use a properly sized notched trowel. The tile retailer is going to be in a position to help you select the proper one for the tile you happen to be replacing. Allow the tile to set for 2-4 hours.

About Grout

Grout is accessible in powdered type or in prepared-touse, pre-combined containers. Grout is accessible in many different colors. When you re-place personal tiles, you are going to need to carefully match the shade of the present grout. When mixing grout follow the instructions and combine it to the consistency of peanutbutter that is easy. Rubber grouting floats are simple and affordable to use. You are going to need to seal the grout 4-8 to 7-2 hrs subsequent to the grout continues to be applied using a grout-sealing co mpound. Grout is protected by sealer from mildew staining and water water damage and mold.

Use the Grout

Scoop some grout and drag the float on the tiles in a minor angle to the tile area pushing grout to the channels between tiles. Continue till every one of the channels between tiles are stuffed with grout. Allow the grout to set for 2 minutes before utilizing the tip of a tooth-brush manage to sleek the lines. The tooth-brush manage generates a uniform depth in the lines. Clean the the top of tile with a moist sponge or moist clear rags. Gently wipe the the top of tile, being mindful maybe not to disturb the grout.

See related

Home

How to Water-Proof a Wood Entry Floor

Your entry way flooring usually takes a beating; the wood can be ruined by dripping moist paws, rain coats and galoshes tromping to the home. Waterproofing your wood flooring offers a protective barrier to help guard against possible water water damage and mold. Wood floors that are unprotected are vulnerable to rotting, mildew and staining. Be pro-active in managing your wood entry floors using a water-resistant sealant. By doing nothing to safeguard your wood, you could be encumbered with costly repairs.

Move rugs, all furniture and other things from your entry way flooring.

Clean your ground Long Beach completely. Sweep up particles out of your floor using dust pan and a broom. Run a vacuum on the ground Phoenix to eliminate dirt particles. Use a damp cloth to wipe the area of your flooring that is entry way to lift any remaining good dirt off. Your ground wants to be totally clear; any dust or grime remaining on the ground Fresno can display up as tough places that are embedded when you use the sealer.

Pour a water-based polyurethane wood flooring end right into a bucket. Water-based floor finishes are green, have a moderate odor, are tough, dry rapidly and clean-up with soap and water.

Use the waterproofing finish to your own entryway flooring by dipping a foam applicator connected to your mop handle to the polyurethane-filled bucket. Start at one end of the entry way flooring, swiping the mop on the ground Flagstaff with front-to-back strokes. Dip the foam mop to the bucket as required. Allow the first coat. Water-based finishes usually dry in three or two hours.

Apply three or two extra coats of the water-proofing end to your own entryway flooring, enabling three or two hours.

See related

Home

The best way to Change Dead Bolts & Handles

Door and most dead bolts handles have similarities with respect to changing and eliminating. Deadbolts have a pair of long bolts that connect the half of the lock to the exterior half. The bolts thread to the face of the lock to stop somebody from removing the the system in the surface. Door handles reside beneath a detachable ring, or have a pair of bolts that thread to the interior ring. One exception is the lever-type that utilizes a keeper on the stem of the manage. Handles and changing dead bolts isn’t especially difficult.

Deadbolts

Unlock the dead-bolt with all the knob or the important. Loosen the bolts and remove the bolts.

Pull the outside and inside parts of of the lock and remove the the system.

Loosen and remove two screws in the surface of the strike together with the screwdriver. Pull the strike mechanism from the fringe of of the door manually. In the event the strike is trapped or comfortable, insert the tip of the screwdriver behind the interior end of the mechanism, and pry the strike free.

Inspect the new dead-bolt strike mechanism and discover the term “Up” on one aspect of the mechanism. Insert the strike to the outer fringe of of the door properly and secure it to the door using the screws that are supplied.

Hold the outer half of the new dead-bolt – without holes for bolts – in put on on the outer aspect of the door with one hand. Feed the connector stem that’s connected to the inside half of the lock through the configured hole in the strike mechanism. Push the half that is within into place from the inside of the door.

Screw the supplied bolts yourself to the holes on the within face of the dead bolt. Tighten the bolts using the screwdriver in equivalent increments. In the event the lock doesn’t function easily loosen the bolts somewhat.

Handles

Remove two screws from your inside ring having a Phillips screwdriver. Pull the outer and interior halves of the manage manually from the sides of the do or. In the event the screws aren’t noticeable proceed to the next action.

Depress a tiny tab on the interior stem of the manage together with the suggestion of a screw-driver that is flat. Hold the tab depressed and pull off the manage straight. Depress the tiny spring clip together with the screw-driver before the ring and remove the ring.

Loosen and remove the screws on the within manage plate with all the Phillips screw-driver. Pull the halves of the manage from the sides of the do-or.

Loosen and eliminate the screws that secure the strike in the fringe of of the do-or. Pull the strike from the do-or yourself, or pry it out with all the screwdriver.

Install the strike to the fringe of of the do-or using the screws that are supplied. Unless mentioned otherwise in the instructions a strike will install with either aspect of the mechanism up.

Insert the stem on the exterior half of the mechanism in to the hole in the stem of the strike mechanism. Hold the half that is outside manage with one-hand in location.

Insert the stem on the within half of the manage into the hole in the stem of the strike mechanism. Hold the manage as you thread the bolts manually in to spot. Tighten the bolts together with the screwdriver.

Slide a detachable ring over the internal stem of the mechanism that is manage before the spring clip snaps and press it in to spot. Align the tab on the manage together with the recess on the stem that is interior, therefore the tab catches and slid the handle in to spot.

See related

Home

The best way to Protect Wicker Furniture With Polyurethane

Protecting your wicker furniture with polyurethane is a finishing touch, maybe after you’ve fixed damaged sections and restored the luster of the furniture with several coats of paint. It’s possible for you to purchase polyurethane in a water- or oil-based type, and equally will safeguard and add toughness to your own furniture. If your furniture will sit outside, so your gleaming end you miss, be certain to purchase a polyurethane which is recommended for outside use will operate well to moisture, sunlight and temperature adjustments.

Place your wicker furniture or in a protected location outside. Minimize dirt and other interference together with the application.

Clean the furniture carefully using a sponge and mild dish soap blended with with water that is warm. Wipe the furniture dry using a rag.

Turn those or parts with great depth inverted so that the polyurethane can be applied by you easier to difficult-to-reach areas. Otherwise, start to use the polyurethane, in sections that are little, from left and from the top down on chairs to right-on tables.

Use the polyurethane in a coat that is slim, maintaining the brush in a right-angle. This can help disseminate the poly to ensure it’s unlikely and slim to drip. Coats are suggested for polyurethane for the reason that when it is applied too thick, resulting in cracking, it dries into a very difficult finish but can be extremely brittle.

Inspect the furniture cautiously to ensure that you’ve got covered the wicker, particularly around corners and seams that are near. Let the polyurethane dry completely. With regards to humidity and the environment, between six and eight hours may be taken by this, but verify the label.

Touch an location of the furniture, including the base of a chair or dining table leg, to make sure that it’s dry. Give it time if it’s sticky. Once it’s dry, use another slender coat of polyurethane.

Throw out your toss-a way brush or clear your varnish brush.

Give your freshly guarded wicker furniture plenty of time to dry before returning it, and treatment.

See related