Garden San Diego

The best way to Dig a Lawn for example in Salt Lake City Up

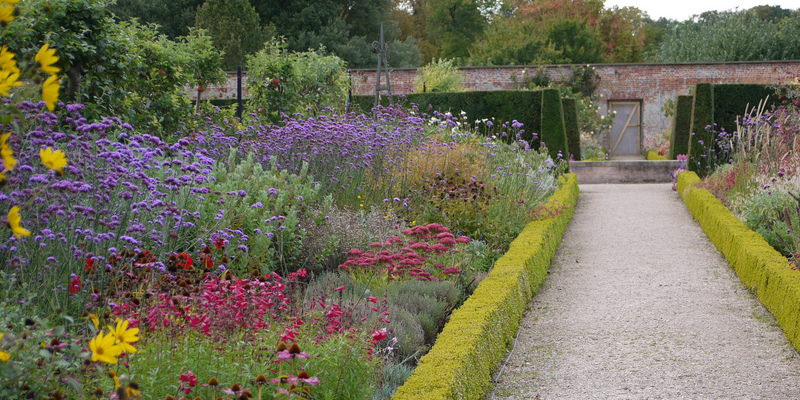
Remove your garden Flagstaff and you are going to open up various possibilities for the yard. Plant Magnesium chloride snow melt Little Rock Lake City a garden Redding of fruiting or flowering crops, install swimming pool or a fresh patio, once you’ve cleared the region or produce a landscaped area using a mixture of all three. Along with your thirsty garden Salt for snow Little Rock Lake City gone, you might find that the water charges are lower. Common garden Flagstaff grasses contain fescue, bluegrass, ryegrass and bentgrass.

Manual Elimination

Digging up Sod in Salt for snow removal Anchorage Lake City yourself is the approach that is most taxing, but it’s the least costly and doesn’t negatively effect the atmosphere. Before you attempt to find out your garden, take off its water supply for four to six weeks its hold on the soil weakens and so it starts to die-off. Water before you plan to begin digging therefore the soil is gentle as well as the roots are more easy to tear-away. Use a shovel, garden Boise hoe and pitch fork remove and to raise the grass (Salting roads in winter Boise Lake City, UT), digging several inches below the area to make sure so the San Diego grass doesn’t reunite you remove because many roots as possible.

Heavy Gear

Power tillers and mini-dozers surely can make the the job of digging up your garden San Diego more easy. Rent power resources and heavy-equipment from home improvement center or a backyard. Factor in both price and the rental price of gasoline or electricity if you are creating a choice about whether to use heavy-equipment. Power tillers use blades tear and to raise grass for example in Long Beach leaving piles of lifeless Sod in Long Beach that you simply will then require to rake up. Mini – dozers and tillers that are fuel or electrical strength grass (San Diego, CA) right from the floor, exposing the s Oil beneath after one pass.

Burn Approach

Use the organic warmth of the sunlight to burn your garden Long Beach out before you eliminate it. To saturation, water the garden Cape Coral from insulating the roots using the garden Phoenix cut as little as feasible to stop lengthy blades. Place clear-plastic sheeting within the whole garden San Diego and use wood stakes every few toes across the whole perimeter to to put up it in place. The sheeting will trap the dampness in, making large temperatures while enabling sunlight through and basically boiling the Salt to melt ice Anchorage Lake City grass to dying. The complete method requires about six months in the summer and finished, the s Oil is lifted far from by the garden Phoenix effortlessly. This method kills plants or weeds that might happen to be waiting for the possibility once your garden Boise is gone to shoot up up.

Cover Approach

Use newspaper before eliminating the garden Fresno and mulch to smother it. This normal approach requires mo Re time than chemical techniques but can be just as successful. Cover the whole garden Boise with several layers of newspaper s O sunlight can-not achieve the grass for example in Calcium chloride snow removal Boise Lake City beneath and go through. Cover the newspaper with wood-chip mulch that is large, about 6″ deep, therefore it and additional blocks the sunlight and retains the paper in spot. Let the garden Cape Coral sitin this state for around two months, then eliminate the covering. Then you’re able to remove the lifeless grass (Salt to melt ice Dover Lake City, UT) with strength or hand resources.

Chemical Approach

It’s possible for you to apply a post-emergent grass- herbicide, like glyphosate, for your lawn for example in San Diego ease the lifting method and to destroy the roots. Its results are included by the negatives of herbicide use on the environmental surroundings and its own propensity to go into the water dining table, when it rains, or to elope in to water lines and sewers. Choose herbicide as a last re sort. The Long Beach grass will shrivel and die within about one week once you’ve applied the herbicide. The Sod in San Diego that is lifeless will put-up small combat when it is removed by you with automatic or handbook techniques. Consider utilizing a herbicide which is specially created for garden Fresno removing. Without leaving any t Race in the s Oil, these services and products were created to be absorbed by the garden Fresno. This may make sure the soil is appropriate for planting Cape Coral as well as the aftereffects are minimum.

See related

Home

The best way to Protect Wicker Furniture With Polyurethane

Protecting your wicker furniture with polyurethane is a finishing touch, maybe after you’ve fixed damaged sections and restored the luster of the furniture with several coats of paint. It’s possible for you to purchase polyurethane in a water- or oil-based type, and equally will safeguard and add toughness to your own furniture. If your furniture will sit outside, so your gleaming end you miss, be certain to purchase a polyurethane which is recommended for outside use will operate well to moisture, sunlight and temperature adjustments.

Place your wicker furniture or in a protected location outside. Minimize dirt and other interference together with the application.

Clean the furniture carefully using a sponge and mild dish soap blended with with water that is warm. Wipe the furniture dry using a rag.

Turn those or parts with great depth inverted so that the polyurethane can be applied by you easier to difficult-to-reach areas. Otherwise, start to use the polyurethane, in sections that are little, from left and from the top down on chairs to right-on tables.

Use the polyurethane in a coat that is slim, maintaining the brush in a right-angle. This can help disseminate the poly to ensure it’s unlikely and slim to drip. Coats are suggested for polyurethane for the reason that when it is applied too thick, resulting in cracking, it dries into a very difficult finish but can be extremely brittle.

Inspect the furniture cautiously to ensure that you’ve got covered the wicker, particularly around corners and seams that are near. Let the polyurethane dry completely. With regards to humidity and the environment, between six and eight hours may be taken by this, but verify the label.

Touch an location of the furniture, including the base of a chair or dining table leg, to make sure that it’s dry. Give it time if it’s sticky. Once it’s dry, use another slender coat of polyurethane.

Throw out your toss-a way brush or clear your varnish brush.

Give your freshly guarded wicker furniture plenty of time to dry before returning it, and treatment.

See related

Home

The best way to Raise a Dishwasher

Dishwashers and cabinets use measurements that are standardized to co-ordinate the very top of the dishwasher by means of your countertop. Dishwashers which are designed to be integrated are occasionally made 3 1/2 inches shorter than the best of the cupboards — which is the same peak as the cupboard toe-kick. The toe-kick is the wood foundation that supports the foundation cupboards. In the event you are remodeling, or including a dishwasher that is shorter you need to create a toe- related to the current toe-kick to elevate it off the ground Chico.

Measure the peak of the current toe-kick on the base cupboards. Measure in the floor to the underside of the lip where the cupboard is cantilevered out in the base. This can be when you’re working in the countertop, wherever your toes fit underneath the cabinet. It’ll be 3 or 3 1/2-inches.

Set a tablesaw rip and fence the 1-by-4 by-96-inch piece of poplar to that

Measure the width of the dishwasher. Subtract 3″ and cut two parts of the poplar at that measurement. Measure the depth of the dishwasher. Subtract 3″ and cut two pieces of poplar at that measurement.

A tablesaw blade. Cut miters on the ends of all parts of poplar. Mitering. don’t drop more than 1/16 inch of the size when

Wood glue on the mitered ends of all parts together with your fingertip. Place the items on their edges. Bring together the miters to produce a toe-kick body. Wrap the frame and tighten. Shoot four-pin nails from both instructions through each corner of the body. Let the glue dry for 1-hour.

Remove the clamp. Place the body contrary to the wallin the required location. Spot the body over them, whether there are pipes or hoses. Place the dishwasher along with the toe-kick frame. You ought to have A3-inch toe-kick expose in the very front of the dishwasher. You ought to have 11/2 inch lip or expose on every side.

See related

Home

The best way to Cover a Dresser

No matter how superbly the relaxation of your space is adorned, an old, beatup dresser is an eye-sore that detracts from it. If you don’t have the money to change it, re-finish it. If paint can’t even disguise an unsightly dresser, re-finish it with material to get a chic and easy makeover. Luxurious cloth and rich can include a pop of texture, pattern or colour to your own furniture that is old to create a showpiece for the home.

Get samples or cloth swatches to bring check and home. You’ll require a material of all or largely organic fibers, using a medium to tight-weave.

Test material for colorfastness. Brush on medium liberally using a sponge applicator. Consider an alternative fabric in the event the colours run poorly. It’ll work fine when there’s very gentle to no colour bleed.

Mark and measure down duration and the width of every section you plan to protect. This may include side panels, leading area, the drawer faces, legs or some framework that is exposed.

Calculate the minimal square footage of material it is going to try cover the dresser. Multiply the height by the width of every surface that is measured, and add each of the results. In the event that you measured in inches, divide the solution to get the square-footage.

Add 20-percent to the measurement for extra in the event of errors. If you’re operating with material that wants matching, include 40% when buying your selected material. Bring it home, clean it, iron it easy and dry it.

Use a pencil or marking chalk to mark the back of the cloth using the measurements that are recorded. Each dresser area will be suit by check always measurements to make certain each material part completely.

Spread the cloth on a low-cost plastic tarp outside. Weigh down the corners with bricks or cans. Spray it with a coat of obvious acrylic sealer and permit it to dry. Spray the reverse facet and flip it, then allow it dry. The sealer makes it stiffer therefore it’s simpler to manage, minimizes fraying and makes the material mo-Re color-fast.

Remove the dresser’s components and sand the surfaces you program to cover. Whether your dresser is laminate, wood or plastic, you want to dull any shine on the surface to promote adhesion. Wipe the surfaces using a moist fabric and allow the dresser dry.

Cut out the cloth sections according to the measurement markings. Brush material decoupage medium on one dresser area having a sponge applicator. Position the material piece over it s O all of the edges satisfy flawlessly, trimming a way extra if required.

Use a brayer or outdated rolling-pin to flatten the cloth and workout air bubbles and wrinkles. Cover each area in change. Apply an ultimate coat of decoupage medium over each area and allow them dry completely.

Run your finger over the material to discover the holes. Make an “X” using a craft knife through the material in order to screw in the drawer pulls or hinges.

See related

Home

How to Even Splotchy Inside Paint

In the event you are preparing to place your house on the marketplace, a brand new coat of paint is a costeffective method to allow it to be appealing to prospective customers. However, customers might be put-off with a paint complete that is splotchy. In case your decorating initiatives have wound up this manner up, it is possible to take action.

Assessing the Issue

Establish if the splotchy look arrives to paint which is still damp. It is a powerful likelihood, in the event that you completed the topcoat the previous night. Test with your finger for tackiness. Open the windows in the event that you sense some elements of the paint are not dry, and enable the area to air. Leave the paint to get several hours, and examine it.

Establish whether it’s it is currently dry, the paint is splotchy. There are three factors that are typical. The first is while operating, you failed to maintain a wet edge. What this means is you applied paint to your surface alongside paint that was dry. Alternatively, trim or you could have attempted to paint a light colour on a shade. It seemed good, when you used what you considered to be your last coat. As it dried, the darkish colour underneath affected the shade. You could have employed filler in holes and cracks, sanded it, and utilized primer to that particular area. This implies two diverse area shades were being painted over by you.

Prepare to re-paint all or some of the are as that are impacted. Be sure you’ve got enough paint for another coat in the event you failed to maintain a moist edge. Buy primer that is enough for two coats in case the issue is the effect of an surface, or an area where only tiny areas were primed, and enough of your shade paint for two coats. Protect as much of the floor as essential with dropcloths. Run masking tape along the edges of surfaces you don’t want to paint.

Correcting the Issue

ASIS required to to improve the difficulty apply paint to as a lot of the surfaces. Don’t try to minimize in throughout the room in the event the ceiling is splotchy. Cut in roughly, and the edge of one-wall the period of two rollers on the ceiling edge beside all the walls. Quickly fillin the gap, utilizing a collection of over-Lapping strokes that are random, with both brush or a roller. Whenever you complete a location about 11-feet long, go back having a collection of strokes s O the paint will dry to a straight end over it.

Paint partitions in sections, should you be correcting a difficulty triggered by your failure to keep a moist edge. Cut along about 11-feet of the wall, and in along the joint between two partitions edge where it joins the ceiling. Before relocating on to a different length of wall fill in the gap explained above.

Primer to your own walls if failure to prime over a shade is the trigger of the look as explained above. When doing this, it is similarly essential to preserve a moist edge. Before implementing two coats of your plumped for shade in the event that you sense the primer appears after it dries, apply another coat. Again, follow the the technique explained above.

In the event the paint on it seems splotchy sand trim lightly. Vacuum all sanding dirt a-way, and apply a coat of wood primer. Leave it to dry, then sand it. Again, vacuum a-way all sanding dust. Apply a a skinny coat of the most notable paint you’ve got chosen for your own woodwork. Allow it to dry, follow the sam e sanding method, and use still another slim coat. If essential, use a third. When painting trim never have some slack at the center of one area. Enjoy a-cup of espresso before you transfer to the next, and when you have finished one area.

See related

Garden San Diego

The best way to Propagate Blue Mist Shrubs

Blue mist shrubs (Caryopteris x clandonensis “Blue Mist”) are deciduous shrubs that bloom in the conclusion of the summer. The powder-blue blooms consider the spot of spring flowers Phoenix that are blooming to add colour to your own garden Chico and landscape. The crops thrive in Sunset’s Environment Zones 2b, 3a, 3b, 4 through 9 and 14 through 24. Mist shrubs increase into a height of 1 to 4-feet along with a width of 3 to 6 feet and are rounded. Mist shrubs that are blue are self-sowing and will be propagated through root stem cuttings in winter and the fall.

Tear off four paper-towel sections. Run moist. Lay the paper towels.

Examine the blue mist shrub. Water the shrub. Allow the moisture.

Examine the shrub in order to find a stem that is healthier. The bottom of the stem resemble an excessively slim, sleek tree-trunk and will be tougher. Follow up the stem and observe the changeover to the green development on top of the stem from tree-trunk look. Locate the area involving the two that’s at least two leaves above it. Bend the region. It’s ready to get a cutting in the event the area makes a sound. Cut the stem in the region where it snapped, 1-inch below a leaf node.

Place the cutting in the container using the paper towels that are moist. Pick out the container right into a cool area.

Remove the cutting in the container. Cut the bottom set of leaves off. Pour a tiny amount of root hormone powder right into a container that is separate. Dip the cutting to the root hormone powder, ensuring that leaf cutting region and the stem are coated. Tap or shake the cutting to remove excess powder.

Fill a tray using a a mix of 60% perlite and 40% soil- mix. Water the combination until moist.

Before the cutting locations are coated slide the cutting to the guts of the t-Ray. Pat the combination round the stem.

Cut off the leading half of every leaf that is remaining.

Place a backyard stake in all corners of the t Ray. Cover the t-Ray having a plastic bag. Place the t-Ray in a place with partial sunlight for six weeks or till roots might be observed through the holes in the base of the t-Ray. Water regularly to sustain s Oil that is moist.

Dig a hole threetimes broader as opposed to root ball and also the sam e depth as the combination in the t-Ray. Remove the root and cutting ball in the tray using a transplanter. Place the cutting in the hole.

Cover the root ball with s Oil. Water the cutting to to be in the s Oil throughout the stem. Allow the s Oil to dry somewhat between waterings.

See related

Garden San Diego

The best way to Grow Chi-Chien Warm Peppers

The Chi- warm pepper, an extra- selection from China, is as delicious as it’s decorative. The eyecatching red peppers make an intriguing alternative to flowers Miami in your yard or stand out in your vegetable garden Redding. Chi-Chien peppers are annuals that develop faring particularly well in areas with moderate winters and warm summers. Chi-Chien crops need little treatment in trade for a plentiful harvest of peppers and grow easily from seed.

Select a backyard website for the Chi- peppers with full-sun, well-drained soil and protection.

Prepare the garden San Diego bed by tilling organic matter to the 7 or 8″ of soil. Mix in one-pound of 20-20-20 fertilizer for every 100 square-feet of soil.

Sow Chi- pepper seeds straight in the garden Flagstaff when the soil temperature exceeds 75 degrees Fahrenheit. Plant the seeds one-quarter half an inch and inch-deep. Space rows 2 to 3 feet.

Water the pepper seeds before the soil feels moist. Don’t let the soil dry before germination, which requires between 15 and 30-days. Continue to keep the soil moist as pepper seedlings require plenty of water.

Pepper seedlings to 2-feet apart after germination happens.

Spread a sheet of plastic, with holes cut out on the garden Fresno bed, for the pepper crops to to manage weeds and keeps the soil warm. Alternatively, distribute a 1- to 2 inch layer of wood-chips, dried leaves or other organic matter across the plants as mulch.

Pepper crops that are fertilize one week starts. Apply 1 1/2 ounces of ammonium sulfate fertilizer per 10 feet of row.

Harvest peppers 8 to 10 months after germination. Break the peppers off the plant Flagstaff by snapping or reducing the stems; use scissors to lessen the possibility of inadvertently breaking a branch off.

See related

Garden San Diego

The best way to Plant Flagstaff Straight Cornfield Rows

Although fields that are big harvest the corn and require lines of corn to assist the farm devices plant San Diego, planting Fresno corn in lines in your yard garden Long Beach has benefits. Rows assist you shift between the rows to control weeds, if required, harvest the corn and spray pesticides. It assists by enabling the wind to distribute pollen effortlessly from plant Chico to several in another row pollinate the corn. Wait following the last frost.

Prepare the soil. Till it using a roto-tiller, little or spade plow to break up the soil at least 6″ below the area. Break up clumps of dirt using a metal garden Chico rake.

To the soil in the beginning of your first-row using a rubber mallet, tap a wood stake. Drive a stake that is 2nd to the soil by the end of the row, making sure it lines up with the stake. Measure 2 to 3-feet near the the stakes and faucet another stake in the beginning and conclusion of the second-row. (ref. 1, page-1) Carry On to your remaining rows. Create to make sure the greatest cross pollination among corn crops.

Tie a length of string between the stakes marking the first-row . The tighter the string as a string that is taut will not sag or bend in the wind as much. Repeat with all the remaining rows.

Create a 1 inch-deep furrow along the first-line of string utilizing your garden San Diego hoe. Corn kernels needs to be planted at 1-inch up to 2″ deep in sandy soil or deep in heavy soil.

Drop seeds in the furrows every 8 to 10″. Cover them with soil utilizing your hand or your hoe. The soil should be a level layer; there is no need to mound the soil within the seeds, which could keep the seeds.

See related

Home

The best way to Cut Glass Wall Tile

Glass is effortlessly when pressure is used in the incorrect way, a item that splinters. This makes reducing a somewhat different process than reducing denser tiles made from stone or clay to glass tiles. Different resources with blades that were sharper are required to slice without chipping, crushing or splintering its area. When these resources are employed, for reducing the glass the rules become comparable to all those used to reduce other tiles to get a house task.

Cutting Glass Mosaics

Any glass wall tiles measuring smaller with glass tile nippers or 2″ in size. These nippers have as they slice the the glass, as opposed to the jaws of tough tile nippers two wheels that change. These blades aid to cut the the glass.

Hold the glass tile in your non-dominant hand. Hold the nippers and line the blades of the two wheels up on the glass where you want to create the cut.

Squeeze together the handles of the nippers. Continue applying pressure before the blades slice through the tile. Over the tile, transfer the blades if required and make another cut in the same row.

Cutting Slim Glass Wall Tiles

Cut glass wall tiles that are , thinner 4mm thick or that don’t have a painted-on colour backing , and-snap technique.

Place the glass tile flat on a table. Place the conclusion of a glass instrument from the edge of the tile while pressing down on the glass and pull the device again toward your self. This can create a line that is scored in the glass.

Place a bit of wire in the mark you scored. Turn over the tile so that it balances on the wire in its rating mark. Before the tile snaps in two tip rests on the dining table and exert stress on the on another edge.

Using a Damp Noticed

Use a tile saw fitted using a glass- slicing blade to cut any glass tiles, including tiles that are thick and the ones that have a colour backing.

Set the tile on the t Ray of the noticed that was damp together with the again of the tile. The area of the tile will faceup in the event the tile h-AS a shade straight back. Line up the region you want to reduce together with the blade of the noticed.

Turn on the noticed and gradually drive the tile to the blade. Don’t force the glass to the blade; the blade will pull it in as it grinds provided that you exert a mild, constant stress on the on the again fringe of of the tile somewhat.

Keep light-pressure on the tile as the glass is gradually cut through by the blade. When the glass is sliced through, flip the blade before retrieving the parts off.

See related