Introduction to Spring Storm Preparation
Spring brings renewal, yet it also unleashes powerful storms capable of inflicting severe damage on homes. Heavy rains, high winds, and hail target vulnerable areas such as roofs, foundations, and exterior walls. Homeowners who adopt a proactive, layered approach can significantly reduce these risks and avoid expensive repairs.
This guide details six essential steps to fortify your property. Each step focuses on specific vulnerabilities, providing clear instructions and practical tips. By addressing these elements systematically, you create a robust defense that withstands seasonal weather challenges.
Step 1: Reinforce the Roof
The roof serves as the primary barrier against rain and wind during storms. Loose shingles or weakened flashing often lead to leaks that compromise the entire structure. Inspecting and repairing the roof before storm season arrives prevents water intrusion and structural weakening.
Begin with a thorough visual examination from the ground and attic. Look for missing granules on shingles, cracked tiles, or deteriorated sealants around vents and chimneys. Replace damaged materials promptly; for asphalt shingles, secure any lifted edges with roofing cement. If your roof exceeds 20 years in age, consult a professional for a full assessment to determine if replacement is necessary.
Installing ridge vents or adding protective underlayment enhances airflow and water resistance. These upgrades, which typically cost between $500 and $2,000 depending on roof size, extend the roof's lifespan and reduce energy costs by preventing moisture buildup.
Step 2: Strengthen the Foundation
A solid foundation anchors your home against shifting soils and floodwaters common in spring. Cracks in concrete or poor grading around the base allow water to seep in, leading to erosion and instability. Addressing foundation issues early maintains the home's level and prevents costly settling.
Examine the foundation perimeter for hairline cracks or efflorescence, which indicates moisture penetration. Seal minor cracks with hydraulic cement or epoxy fillers, ensuring surfaces remain dry during application. For larger fissures, hire a structural engineer to evaluate and recommend reinforcements such as steel piers or carbon fiber straps.
Improve soil drainage by regrading the yard to slope away from the foundation at a rate of one inch per foot for the first six feet. This simple adjustment, often achievable with basic landscaping tools, diverts rainwater effectively and costs less than $300 in labor and materials.
Step 3: Secure Walls and Siding
Exterior walls and siding endure the brunt of wind-driven debris and rain. Damaged panels create entry points for moisture, fostering mold growth and insulation degradation. Fortifying these surfaces ensures they remain intact and weatherproof.
Inspect siding for loose boards, warped vinyl, or peeling paint that exposes wood to the elements. Tighten fasteners and replace compromised sections with impact-resistant materials like fiber cement or metal siding. Apply fresh caulk around joints and seams to seal gaps, using a high-quality silicone formula rated for outdoor use.
Consider adding storm shutters or plywood covers for particularly exposed walls in high-wind areas. These barriers, secured with clips or bolts, absorb impacts from flying objects. Installation kits are available for $100 to $500, offering reusable protection that homeowners can manage independently.
Step 4: Seal Windows and Doors
Windows and doors represent common weak points where wind and water infiltrate. Ill-fitting frames or cracked glass amplify storm damage by allowing drafts and leaks. Proper sealing maintains energy efficiency and interior dryness.
Check all windows and doors for gaps around frames and sills. Apply weatherstripping made of foam or rubber to compress against surfaces, creating an airtight seal. For glass panes, install protective film that holds shards in place during impacts, reducing injury risks and cleanup efforts.
Test door hinges and locks for sturdiness; reinforce weak points with longer screws or metal brackets. In regions with frequent hail, opt for impact-rated glass replacements, which meet safety standards and qualify for insurance discounts. These measures typically require one weekend of work and under $400 in supplies.
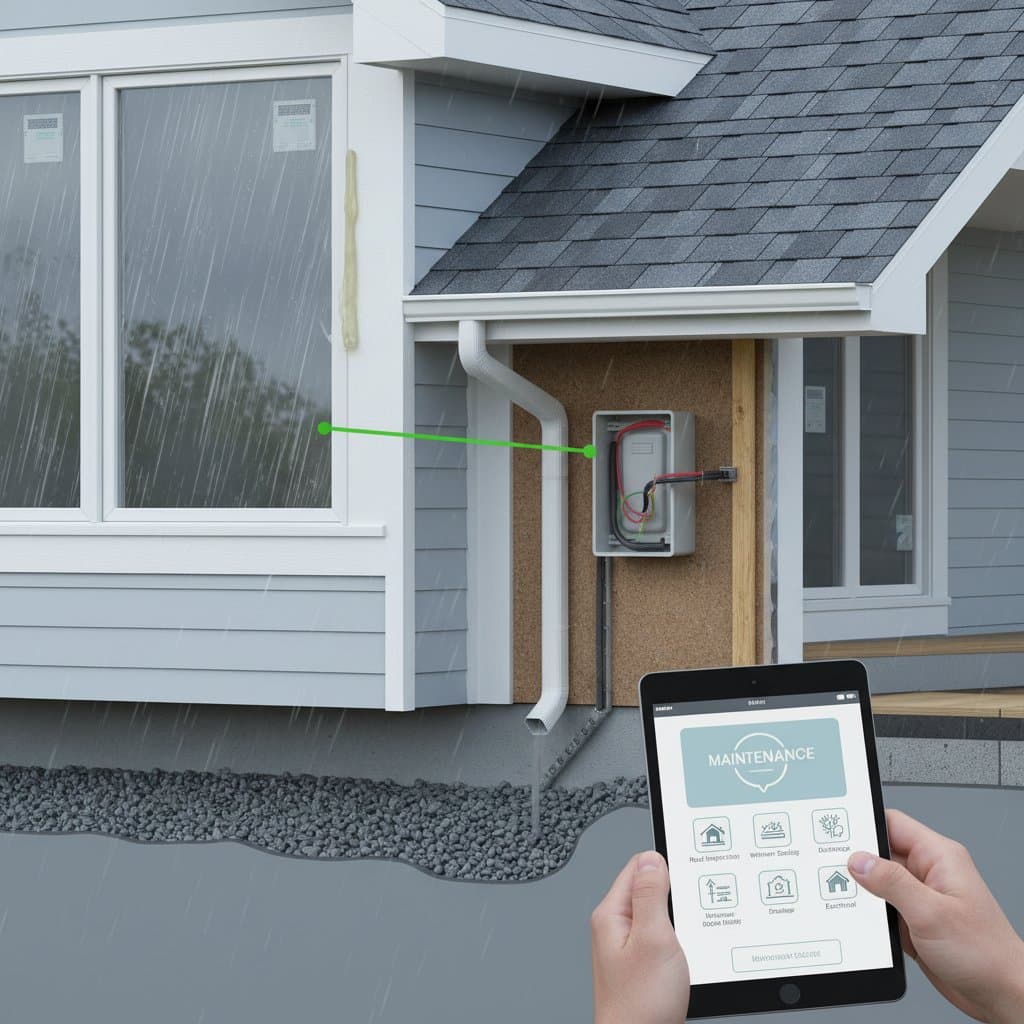
Step 5: Enhance Drainage and Electrical Systems
Effective drainage prevents water accumulation that threatens basements and crawl spaces. Electrical systems, meanwhile, face hazards from surges and flooding. Safeguarding these components avoids disruptions and fire risks during storms.
Clear gutters and downspouts of debris to ensure free flow; extend downspouts at least five feet from the foundation to direct water away. Install French drains or catch basins in low-lying areas to channel excess runoff. These systems, priced from $1,000 to $3,000 for professional installation, dramatically reduce flood potential.
For electrical protection, install surge protectors at the main panel and ground-fault circuit interrupters in wet areas like garages. Elevate outlets and wiring in basements above potential flood levels. Regular testing of these devices, performed annually, confirms reliability and prevents outages.
Step 6: Protect Outdoor Features and Surroundings
Outdoor elements like patios, fences, sheds, and trees directly affect how storms impact your property. A falling branch or unsecured fence can cause substantial secondary damage to structures. Proactive measures here complete the layered defense.
Trim tree branches that extend within ten feet of the roofline to eliminate projectile hazards. Secure outdoor furniture using heavy-duty straps or relocate items to sheltered spaces. Inspect deck fasteners and railings for stability, tightening screws and replacing rusted hardware as needed. Anchor sheds and playsets with ground augers driven deep into stable soil.
These tasks generally require less than a day and involve materials costing under $200. Yet, they avert thousands of dollars in potential repairs by containing storm effects to the exterior.
Troubleshooting Common Issues
Even with thorough preparation, storms may cause unexpected problems. Swift action limits further harm, such as mold proliferation or material decay. The following table outlines responses for frequent post-storm challenges.
| Issue | Immediate Action | Long-Term Fix |
|---|---|---|
| Leaking roof | Position buckets or tarps to capture water | Arrange professional repairs and check attic insulation |
| Flooded basement | Shut off power and pump out water | Add a sump pump system and adjust site grading |
| Wind-damaged siding | Cover exposed areas with plastic sheeting | Replace affected panels and bolster framing |
| Debris-clogged gutters | Clear manually or with a leaf blower | Fit gutter guards to block future buildup |
Respond to these within 24 hours to curb escalation. Document damage with photos for insurance purposes.
Establishing a Maintenance Routine
After completing inspections and repairs, establish a consistent schedule to sustain readiness. Calendar quarterly reviews of gutters, seals, and foundation zones. Assemble a storm emergency kit including flashlights, batteries, tarps, and waterproof tape, stored in an easily reachable spot.
Residents in high-risk weather zones benefit from yearly professional evaluations. Roofing and foundation specialists often provide comprehensive packages for $150 to $400, identifying subtle issues before they worsen.
Sustaining Long-Term Resilience
Investing in storm protection yields enduring advantages beyond immediate safety. It preserves home equity, reduces insurance filings, and prolongs the durability of critical systems. Moreover, a fortified residence fosters a secure, enjoyable space resilient to environmental shifts.
Proactive efforts today eliminate the urgency of crisis interventions tomorrow. Through these targeted protections, you cultivate a home equipped for spring storms and beyond, ensuring stability across all seasons.