
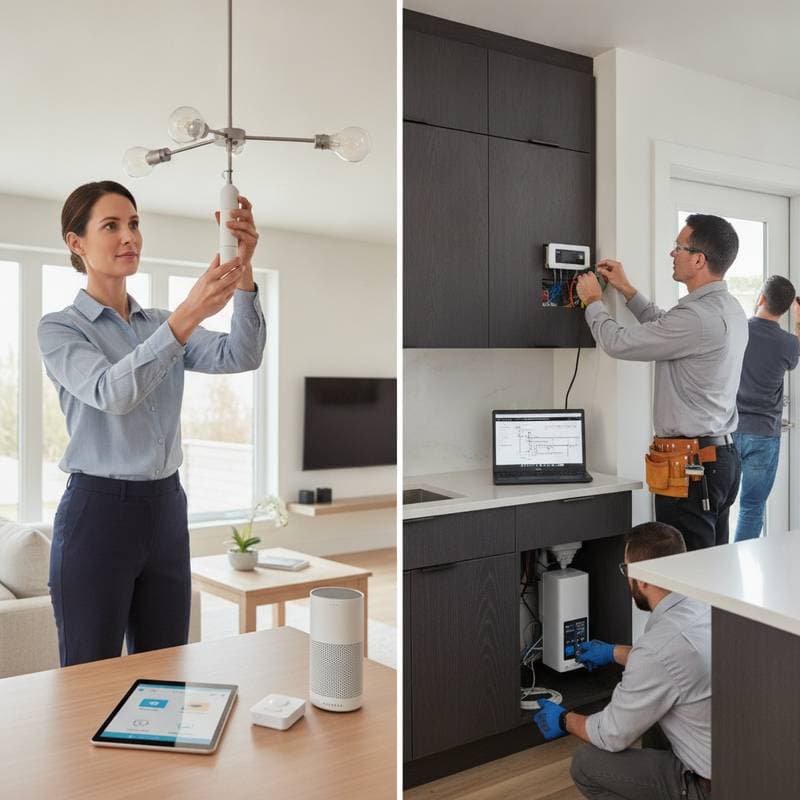
DIY vs Pro: Smart Home Upgrades Worth Paying For
Your phone is charging on the counter, the porch light is still glowing in daylight, and the thermostat seems determined to heat an empty house. Smart home technology promises to fix these small annoyances, but choosing between a DIY installation and a professional can feel more confusing than the gadget itself.
A practical rule helps: DIY smart upgrades are usually best when they plug in, stick on, or connect without changing household wiring. Pay a professional when the project involves electrical circuits, security reliability, water protection, or complicated system integration.
Basic DIY devices cost about 25 to 300 dollars each, while professional installation commonly adds 100 to 600 dollars per project. Larger wired upgrades can reach 1,500 dollars or more, depending on regional labor rates, permits, and the condition of your home.
Key Points
- Choose DIY for plug in devices, smart bulbs, sensors, speakers, and simple video doorbells.
- Hire a licensed professional for new wiring, electrical panel work, hardwired cameras, thermostats with unfamiliar wiring, and motorized shades.
- Expect a DIY project to take thirty minutes to half a day. Professional jobs may take several hours to multiple visits.
- Use products with strong privacy controls, local control options, and compatibility with your preferred smart home platform.
- Plan for maintenance, battery replacement, software updates, and possible equipment replacement.
The Best Smart Upgrades for DIY Installation
If you want a quick win without turning your living room into a technology lab, begin with equipment that uses existing power and uncomplicated connections.
Smart Plugs and Lighting
Smart plugs typically cost 15 to 40 dollars, while smart bulbs range from 10 to 60 dollars each. Installation involves plugging in the device, downloading an app, connecting to Wi-Fi, and assigning a room. You can automate lamps, holiday lighting, coffee makers designed for automatic startup, and small fans.
Smart bulbs are particularly approachable because you can restore the original setup by unscrewing the bulb. Choose bulbs that support your preferred voice assistant or smart home platform. If your Wi-Fi signal is weak, a hub based system may be more reliable than dozens of individual Wi-Fi devices.
Allow thirty minutes to install and test a small group of devices. Label rooms clearly in the app. Otherwise, you may eventually ask the kitchen light to turn off while standing in the bedroom, which is a tiny but surprisingly dramatic betrayal.
Leak Sensors and Environmental Monitors
Water leak sensors cost about 15 to 80 dollars and can sit beneath sinks, near washing machines, beside water heaters, or in basement areas. More advanced systems may include a shutoff valve, raising the equipment cost to 300 to 1,000 dollars.
Place the sensor on a clean, dry surface and test the alarm before trusting it. A sensor can alert you to trouble, but it may not stop a burst pipe. If you want automatic water shutoff, professional installation is often sensible because valve compatibility, pipe access, and local plumbing requirements matter.
Replace batteries according to the manufacturer guidance, and test sensors whenever you inspect smoke alarms. A device that quietly died months ago offers the same protection as a decorative coaster.
Smart Speakers, Displays, and Doorbells
Smart speakers and displays usually cost 30 to 300 dollars. They are simple to install, though privacy settings deserve attention. Review microphone controls, voice recording storage, guest access, and account security.
Battery powered video doorbells are also reasonable DIY projects, with equipment prices around 80 to 300 dollars. You will need a stable wireless signal and a suitable mounting surface. Follow the manufacturer instructions carefully, and use security screws if included.
A hardwired doorbell becomes a professional candidate when the existing transformer is missing, the wiring is damaged, or the voltage is uncertain. Electrical work around an exterior entry can expose you to moisture, hidden wiring, and code requirements.
Smart Upgrades Worth Professional Help
Some projects look simple in a product advertisement but become complicated once drywall, old wiring, or local regulations enter the picture.
Smart Thermostats
A smart thermostat commonly costs 100 to 350 dollars, with professional installation adding about 150 to 500 dollars. DIY installation can work when you have a compatible low voltage system, clear wire labels, and a common wire where required.
Stop and consult a heating and cooling professional if your system uses multiple stages, heat pumps, zone controls, proprietary wiring, or unusual accessories. Take a photo of the original connections before removing anything, and turn off power at the equipment switch. A tripped breaker is not proof that every component is safe to handle.
Incorrect wiring can damage expensive equipment or leave you without heating or cooling. A professional can also verify airflow, equipment settings, and safe operation instead of treating the thermostat as an isolated gadget.
Hardwired Cameras and Whole Property Security
Wireless cameras are usually manageable for DIY installation, with equipment costs around 50 to 400 dollars per camera. Hardwired cameras, network video recorders, exterior conduit, and multiple access points are different. A professionally designed system may cost 800 to 3,500 dollars, depending on coverage and storage needs.
Pay for help when cameras require attic access, exterior drilling through masonry, new network cable, or elevated work. A professional can position cameras to reduce blind spots while respecting privacy boundaries around neighboring property.
Ask about data storage, encryption, remote access, and what happens if the internet fails. A camera that records only to a cloud account may not meet your needs during an outage. Local storage can improve resilience, though it requires its own maintenance and protection.
Smart Electrical Switches, Dimmers, and Panels
Replacing a standard switch with a smart switch often costs 25 to 100 dollars for the device. Professional installation may add 100 to 250 dollars per switch, with regional variation. This is one area where confidence should not outrank safety.
Call a licensed electrician if you see aluminum wiring, crowded boxes, melted insulation, missing grounding, uncertain circuit labels, or multiple wires that don’t match the installation guide. Older homes may lack a neutral wire, and some smart devices are not compatible with that arrangement.
Never work on a live circuit. Turn off the breaker, verify power with a properly rated tester, and follow local electrical code. In many regions, permits or inspection requirements apply to new circuits, panel changes, and certain rewiring projects. Ask your electrician what documentation is needed before work begins.
How to Decide Between DIY and a Contractor
Use this quick decision framework:
- Does the upgrade alter household wiring, plumbing, gas equipment, or structural materials? Choose a licensed professional.
- Does it affect life safety or property security? Professional design is usually worth considering.
- Can you restore the original setup without damage? DIY is more reasonable.
- Will a mistake create hidden damage? Ask for help before opening walls, ceilings, or exterior cladding.
- Is the device platform compatible with your network and other equipment? Confirm this before buying.
A contractor who understands smart home systems can coordinate electricians, plumbers, heating specialists, and network technicians. An AI contractor or digital planning tool can help compare products, build a materials list, organize questions, and identify possible compatibility problems. It cannot inspect hidden wiring, verify code compliance, or replace a licensed professional on site.
Budgeting for Smart Home Improvements
Create three budget levels before shopping:
- Starter budget, 50 to 200 dollars: smart plugs, bulbs, one leak sensor, or a basic speaker.
- Connected room budget, 250 to 900 dollars: thermostat, doorbell, several switches, sensors, and a network upgrade.
- Whole home budget, 1,000 to 5,000 dollars or more: coordinated security, lighting controls, water protection, networking, and professional labor.
Regional labor costs can vary sharply between urban and rural markets. Ask for an itemized estimate covering equipment, labor, permits, subscription fees, disposal, testing, and follow up service. A low installation price may not include network troubleshooting or future support.
Prioritize upgrades that solve a repeated problem. A leak sensor near a washing machine may protect more value than a smart display in every room. Energy savings from a thermostat depend on your equipment, insulation, household habits, and local utility rates, so treat savings estimates as projections rather than promises.
Safety, Privacy, and Long Term Care
Use products from established manufacturers that publish security updates and compatibility information. Create unique passwords, enable multi factor authentication, and place smart devices on a guest or dedicated network when your router supports that feature.
Keep firmware updated, but schedule updates when you can test essential functions afterward. Replace batteries before they fail, clean camera lenses, check sensor placement, and review user permissions when household members move in or out.
Call a professional when a device repeatedly disconnects, overheats, trips a breaker, causes flickering, or behaves unpredictably. Do not bypass a safety feature to make an installation work.
Building a Smarter Home at Your Pace
Start with one problem and one room. Install a smart plug, test an automation, and live with it long enough to discover whether it genuinely helps. Then expand using a consistent platform and clear naming system.
DIY upgrades can make your home more convenient without a large commitment. Professional work earns its price when it protects wiring, equipment, privacy, and property.