Spring Checklist to Strengthen Your AC Against 2025 Heat
As the initial warm days arrive, a sense of renewal permeates the home. Windows open slightly, sunlight streams in, and the gentle whir of the air conditioner signals the transition to warmer weather. This pleasant air flow serves as a subtle cue: without proper preparation, the approaching heat waves could transform comfort into discomfort. Spring provides an ideal opportunity to inspect, service, and fortify the AC system before peak demand arrives.
The Importance of Spring AC Maintenance
Homeowners often delay AC checks until the first intense heat, only to face failures when the system strains under load. Central and ductless units alike diminish in performance without consistent care. Accumulated dirt, obstructed filters, and insufficient refrigerant compel the equipment to labor excessively, which elevates utility expenses and accelerates wear.
Regular spring servicing enhances cooling output by as much as 15 percent and prolongs equipment durability by multiple years. These efforts yield financial benefits while promoting consistent indoor conditions, superior air purity, and reduced risk of unexpected failures. View this process as an essential yearly investment in reliable home comfort.
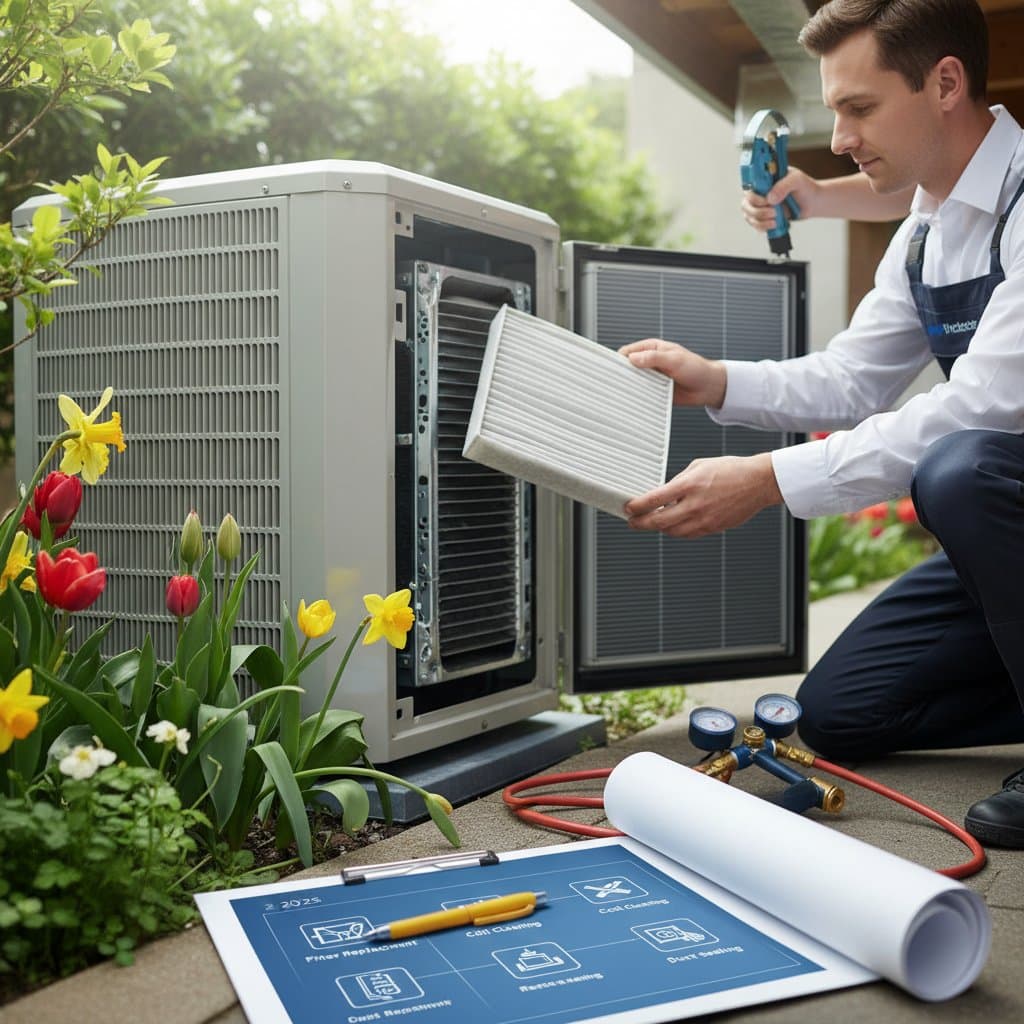
Step One: Examine Filters and Airflow
Begin with the air filter, a fundamental yet frequently neglected component that shields the system from dust, pollen, and particles. A blocked filter impedes air circulation, compelling the AC to operate inefficiently. Exchange disposable filters every one to three months, adjusting frequency based on factors such as pet presence or local dust levels.
For washable filters, clean them using mild detergent and allow full drying prior to reinsertion. To assess condition, position the filter against light; if visibility through it proves impossible, cleaning or replacement becomes necessary. This straightforward action significantly elevates operational efficiency and enhances indoor air standards.
Step Two: Clean Condenser and Evaporator Coils
The outdoor condenser unit collects leaves, soil, and clippings, which gradually impair heat dissipation. First, disconnect power at the breaker. Detach the cover and brush off loose material, followed by rinsing the fins inward with a hose at low pressure. Pressure washers risk deforming the fins, so avoid their use.
Coil cleaning solutions, available for ten to twenty dollars at hardware outlets, address stubborn residue. Apply the spray, permit the foam to dissolve contaminants, and rinse thoroughly. The indoor evaporator coil, situated near the furnace or handler, also gathers dust; professional service proves advisable for those lacking HVAC expertise, as it includes leak detection and corrosion evaluation to avert future complications.
Step Three: Clear the Condensate Drain Line
This line expels moisture generated during operation; blockages from algae or mold lead to backups that damage the unit or cause indoor leaks. Identify the PVC pipe adjacent to the indoor component and remove the end cap. Introduce a cup of distilled vinegar or a warm water and soap blend, then flush with fresh water to inhibit microbial development.
For existing obstructions, employ a wet-dry vacuum at the outdoor exit to extract debris. Maintaining clear passageways supports effective dehumidification and safeguards against water-related repairs.
Step Four: Secure Electrical Connections and Verify Components
Frayed or loose wiring contributes to erratic performance or total shutdowns. With power isolated, inspect exposed connections for damage or oxidation. Tighten screws and terminals carefully; evidence of burns or melting demands immediate professional intervention.
Calibrate the thermostat by replacing batteries and confirming accurate settings. Upgrading to programmable or smart versions enables precise regulation and potential savings of ten percent on cooling expenses via optimized schedules.
Step Five: Assess Refrigerant Levels and Pressure
Insufficient refrigerant, often due to leaks, results in inadequate cooling, coil icing, and compressor stress. Homeowners should not manage refrigerant; instead, monitor indicators such as unusual noises, frost formation, or temperature inconsistencies. Prompt professional service prevents escalation, with recharge costs ranging from one hundred to four hundred dollars based on unit specifications and location.
Step Six: Examine Ductwork for Leaks and Insulation
Duct imperfections dissipate up to thirty percent of conditioned air. During system operation, inspect accessible sections in attics or crawl spaces for escaping drafts at joints. Apply foil tape or mastic for small repairs; comprehensive assessments require technician tools like pressure testers for precise diagnostics.
Insulating exposed ducts with spray foam or wraps minimizes losses in unconditioned areas, fostering uniform temperatures and reduced energy use.
Step Seven: Service the Blower Fan
Dust on fan blades disrupts balance and airflow. Power off, access the assembly, and clean surfaces with a soft cloth without altering blade positions. Post-restart, unusual odors or vibrations signal the need for professional lubrication or part replacement.
Step Eight: Test Overall Performance and Air Distribution
Operate the system for fifteen minutes minimum, monitoring for anomalies in sound, vent output, and temperature readings. Address imbalances by clearing obstructions from registers and ensuring even coverage. Optimal distribution eases system workload and elevates living comfort.
Safety Guidelines and When to Call Professionals
DIY applies to basic tasks, but electrical work, refrigerant adjustments, and advanced cleanings require certified HVAC experts. Annual professional tune-ups, priced at one hundred to two hundred dollars, encompass diagnostics, calibration, and compliance checks. Prioritize this for units over ten years old or long unserviced.
Disconnect electricity before any internal access. Use protective gear during chemical applications. Halt operation and seek help for leaks, scorched scents, or electrical faults.
Cost and Time Investment Overview
Most DIY steps require thirty minutes to two hours and minimal expense: filters cost five to twenty dollars, cleaners ten to twenty dollars, and tape or sealant under fifteen dollars. Professional services add one hundred to two hundred dollars for inspections or repairs. Early action avoids emergency calls, which exceed five hundred dollars during peak season.
Practical Tips for Optimal Results
- Book professional services in early spring to secure appointments.
- Maintain a record of all maintenance activities, including dates and observations.
- Keep shrubs and plants at least two feet from the outdoor unit for unobstructed ventilation.
- Insulate refrigerant pipes to minimize condensation and enhance efficiency.
- Install smart thermostats for data insights, remote access, and automated adjustments.
Achieve Reliable Cooling and Savings This Summer
Implementing this spring routine equips your AC for enduring performance amid rising temperatures. Expect lower bills, fresher air, and uninterrupted comfort. Proactive care transforms seasonal challenges into seamless enjoyment of your home environment.