Prepare Your HVAC System for Spring: Reduce Energy Bills by Up to 20 Percent
Spring marks the transition from heating to cooling, and it presents an ideal opportunity to optimize your HVAC system. A properly maintained unit operates more efficiently, which leads to lower energy consumption and extended equipment lifespan. Homeowners who follow a structured maintenance routine often see reductions in utility bills by as much as 20 percent.
This guide outlines essential tasks to complete over a weekend. Each step provides time estimates, cost details, and guidance on whether to handle it yourself or hire a professional. By addressing these areas, you ensure reliable performance throughout the warmer months.
Step 1: Replace or Clean Air Filters
Air filters trap dust and debris, but they become clogged over time, forcing the system to work harder. Start by locating the filter in your return air duct or furnace. Replace it with a new one rated for your system's needs, such as a MERV 8 to 13 filter for balanced filtration and airflow.
- Timeline: 10 to 15 minutes
- Cost: $10 to $30 per filter, depending on type and size
Cleaning reusable filters involves vacuuming and rinsing them under water. Professionals recommend replacement every one to three months, especially before peak seasons, to maintain optimal efficiency.
Step 2: Clean Outdoor Condenser Coils
The outdoor condenser unit accumulates dirt, leaves, and pollen during winter, which hinders heat transfer and raises energy use. Turn off the power supply at the breaker to ensure safety. Remove the top grille if accessible, then use a garden hose to spray water through the coils from the inside outward.
Avoid high-pressure tools that might bend the delicate fins. If bends occur, straighten them with a fin comb, a tool available for about $15.
- Timeline: 30 to 45 minutes
- Cost: Less than $10, assuming you have a hose
This maintenance restores airflow and can improve cooling capacity immediately.
Step 3: Check and Calibrate the Thermostat
An inaccurate thermostat leads to uneven temperatures and unnecessary cycling of the system. Test yours by comparing its reading to a separate thermometer. For programmable models, set schedules that align with your daily routines, such as raising the temperature when you leave home.
If the device is battery-powered, replace the batteries. Consider upgrading to a smart thermostat for remote control and energy-saving features, which can yield additional savings.
- Timeline: 20 to 30 minutes
- Cost: $0 for basic checks; $100 to $250 for a smart upgrade
Proper calibration ensures the system runs only when needed, directly impacting your bills.
Step 4: Inspect Air Ducts and Vents
Leaky or obstructed ducts waste up to 30 percent of conditioned air, increasing energy demands. Examine visible sections for gaps, holes, or disconnected joints. Seal minor issues with foil-backed tape or mastic sealant, which forms a durable barrier.
Vacuum all vents and registers to clear dust and debris. For hidden leaks or complex systems, a professional assessment uses specialized cameras and tools.
- DIY Sealing Cost: $20 to $50
- Professional Inspection and Sealing: $300 to $800, based on home size
These efforts enhance air distribution and overall system performance.
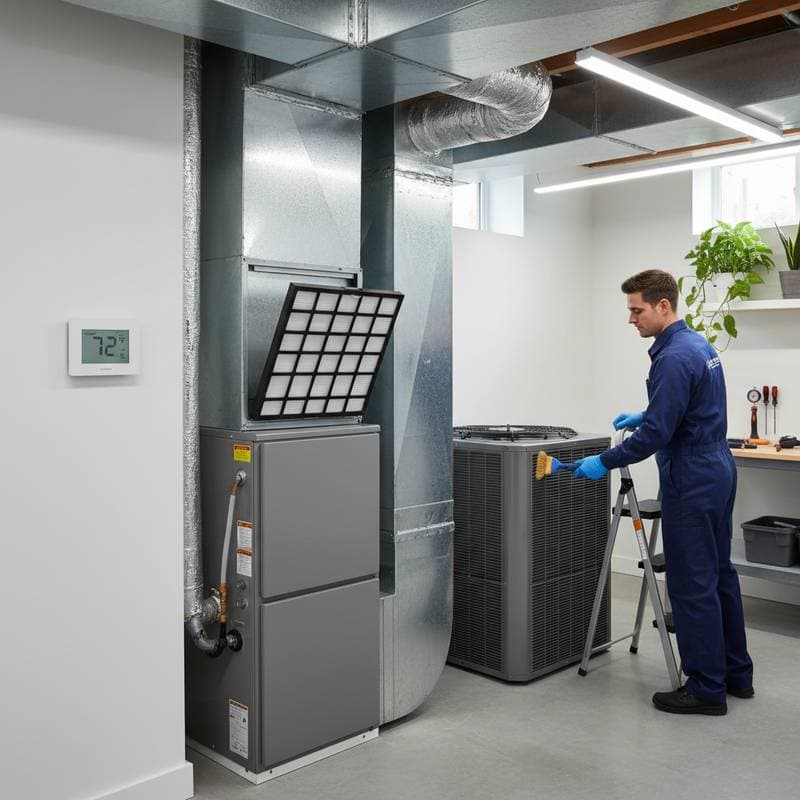
Step 5: Clean Indoor Evaporator Coils
Located inside the air handler, evaporator coils can collect mold, dust, and residue, reducing cooling effectiveness. Access the coils by removing the access panel, then use a soft brush or no-rinse coil cleaner to remove buildup. Follow with a gentle rinse if the product allows.
This task requires caution to avoid damaging components. If you lack experience, consult a technician to prevent voiding warranties.
- Timeline: 45 to 60 minutes
- Cost: $10 to $20 for cleaner and tools
Clean coils improve heat absorption and prevent strain on the compressor.
Step 6: Clear Drain Lines and Check for Blockages
Clogged condensate lines cause water backups, potential damage, and higher humidity levels. Locate the drain line near the indoor unit and flush it with a solution of one part vinegar to four parts warm water. Use a wet-dry vacuum to pull out stubborn debris from the end.
Install a drain pan tablet to inhibit future algae growth. Regular clearing keeps the system running smoothly and avoids costly repairs.
- Timeline: 15 minutes
- Cost: Under $5
Additional Strategies for Year-Round Savings
Maintain clearance around the outdoor unit by trimming vegetation and removing debris, ensuring at least two feet of space on all sides. Integrate ceiling fans to distribute air evenly, allowing you to set the thermostat higher without discomfort. Address drafts at windows and doors with weatherstripping and caulk to minimize unconditioned air infiltration.
Evaluate your home's insulation, particularly in the attic, as upgrades here offer substantial returns on investment. These habits complement your spring prep and sustain efficiency over time.
Secure Comfort and Savings Through Maintenance
Investing time in these HVAC tasks prepares your home for efficient cooling and positions you for noticeable bill reductions. Cleaner components and sealed pathways not only cut energy use but also enhance air quality and system reliability. Schedule annual professional tune-ups to build on this foundation and protect your long-term investment.