Get Your AC Ready for Spring
The first warm day often arrives before homeowners expect it. Dust accumulates inside the unit during winter, filters lose effectiveness, and mechanical parts sit idle. A proactive tune up now prevents sudden failures when temperatures climb.
Spring HVAC care improves efficiency, maintains indoor air quality, and stabilizes energy costs. Consistent attention turns the cooling system into a dependable part of daily comfort.
Why Spring Maintenance Matters
Restarting an idle system under heavy load reveals hidden problems quickly. Restricted airflow or degraded refrigerant causes the unit to consume more electricity while delivering less cooling. In many climates this inefficiency adds hundreds of dollars to summer utility bills.
Early inspection also stops minor issues from becoming major repairs. A loose connection or worn component may function in mild weather yet fail during peak heat. Addressing these items in advance keeps the system quiet and consistent.
Step One: Replace Air Filters
Restricted airflow forces the blower motor to work harder. Check the filter by holding it to a light source. Replace it when light passes through only faintly.
Select a filter rated MERV 8 to 11 for typical homes. Record the installation date on the frame. New filters cost between ten and forty dollars.
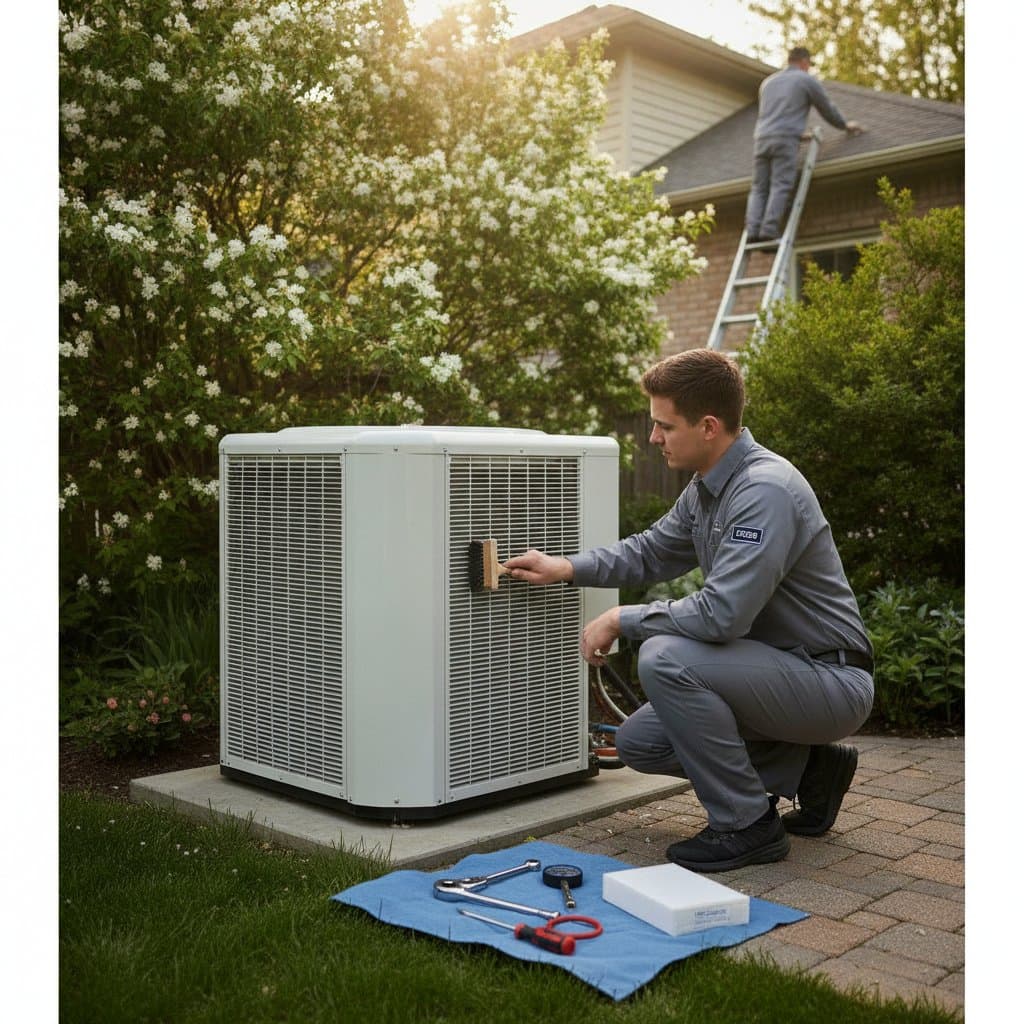
Step Two: Clean the Outdoor Condenser
Leaves, pollen, and debris collect on the fins and block heat release. Turn off power at the disconnect box. Brush or vacuum loose material, then rinse from inside outward with a garden hose. Straighten bent fins with a comb.
Maintain two feet of clearance around the unit by moving planters or trimming plants.
Step Three: Check the Thermostat
Confirm the device is set to cooling mode and that batteries are fresh. An upgrade to a programmable model allows automatic setbacks during unoccupied hours and can reduce annual energy use by up to ten percent.
Step Four: Inspect Ducts and Vents
Feel for consistent airflow in every room. Examine accessible duct sections for gaps. Seal small openings with mastic or foil tape. Professional pressure testing, priced from one hundred fifty to four hundred dollars, locates hidden leaks when needed.
Step Five: Run an Early Test Cycle
Operate the system for a full cooling period while temperatures remain moderate. Note any unusual sounds, short cycling, or weak airflow. Schedule service promptly if performance falls short.
Step Six: Clean Coils and Drain Lines
Turn off power to the air handler. Wipe the evaporator coil with a soft cloth and approved cleaner. Flush the condensate line with vinegar to inhibit algae. These steps protect both equipment and indoor air quality.
Step Seven: Verify Refrigerant Lines
Inspect insulation on the lineset. Replace damaged sections to limit energy loss. Only a licensed technician measures refrigerant levels or repairs leaks.
Step Eight: Arrange Professional Service
A technician performs electrical tests, measures temperature split, and cleans internal components. Annual visits typically cost eighty to two hundred dollars and satisfy most warranty requirements.
Step Nine: Review Overall Efficiency
Compare the current SEER rating with newer equipment if the system exceeds ten years of age. Supplement performance by adding insulation, sealing windows, and using ceiling fans. These measures can lower cooling demand by fifteen percent.
Step Ten: Confirm Safety Items
Inspect electrical connections for corrosion. Verify that outdoor receptacles have proper covers and that breakers operate correctly. Shut the system down and call a professional if burning odors appear.
Regional Timing and Budget Planning
Perform maintenance after daytime temperatures rise above freezing in cold climates. Coastal homes require more frequent condenser rinsing to limit salt corrosion. Desert regions benefit from monthly filter changes.
A simple cost table helps homeowners plan:
- Filter replacement: ten to forty dollars, every one to three months
- Coil cleaning: ten to twenty dollars DIY or seventy five to one hundred fifty dollars professional
- Duct testing: one hundred fifty to four hundred dollars every two years
- Full tune up: eighty to two hundred dollars once a year
- Thermostat upgrade: one hundred to two hundred fifty dollars
Maintain Consistent Performance
Mark quarterly filter changes on a calendar. Keep a written record of all service visits. Respond quickly to changes in noise, cycle length, or odor. These habits extend equipment life and reduce total ownership costs by at least twenty five percent.